

Quick Answer
You make a Christmas gnome by stuffing a fabric tube for the body, gluing on a faux fur beard, attaching a wooden bead nose, then topping it off with a cone shaped hat. Most beginners finish one gnome in about two hours, even without a sewing machine.
Christmas gnomes have become one of the most popular handmade holiday decorations, and it is easy to see why. They are cute, a little mischievous looking, and simple enough for a beginner to finish in an afternoon. This guide walks you through a no sew method using a sock or fabric tube for the body, so you do not need a sewing machine to get started. Expect to spend one to two hours per gnome, plus drying time for the glue. Difficulty level is easy, and it is a fun project to do with kids too.
What You Need
| Item | Purpose | Status |
|---|---|---|
| Long tube sock or fabric scrap | Body of the gnome | Standard |
| Rice, dried beans, or poly-fil stuffing | Fills the body so it holds its shape | Standard |
| Wooden bead, 1.5 to 2 inches | The nose | Varies by gnome size |
| Faux fur strip or chunky yarn | The beard | Standard |
| Coordinating fabric or felt | The pointed hat | Standard |
| Hot glue gun and glue sticks | Holds everything together | Caution, hot surface |
| Rubber bands or twine | Ties off the body and secures the hat | Standard |
| Scissors | Cutting fabric and trimming the beard | Standard |
Step 1: Build the Body
Start with your sock or fabric tube. Fill it with rice, dried beans, or poly-fil until it feels firm but still a little floppy. That floppiness is what gives a gnome its charming, slouchy shape.
If you are using a sock, the toe end becomes the base and the open end goes toward the top. Pack the stuffing down as you go so there are no air gaps. Leave about two inches of empty fabric at the top, then gather it and secure it tightly with a rubber band or a few wraps of twine.
Trim off any extra fabric above the tie so the top sits neatly. This gathered top is where the hat will eventually attach, so keep it centered and even. If your gnome will not be standing upright, add a little extra weight like dried beans or pebbles to the bottom so it can sit without tipping.
Step 2: Cut and Shape the Hat
Cut a half circle from your hat fabric, roughly ten to twelve inches across for a medium sized gnome. Fold it into a cone shape so the straight edges overlap slightly, then glue or stitch along that seam.
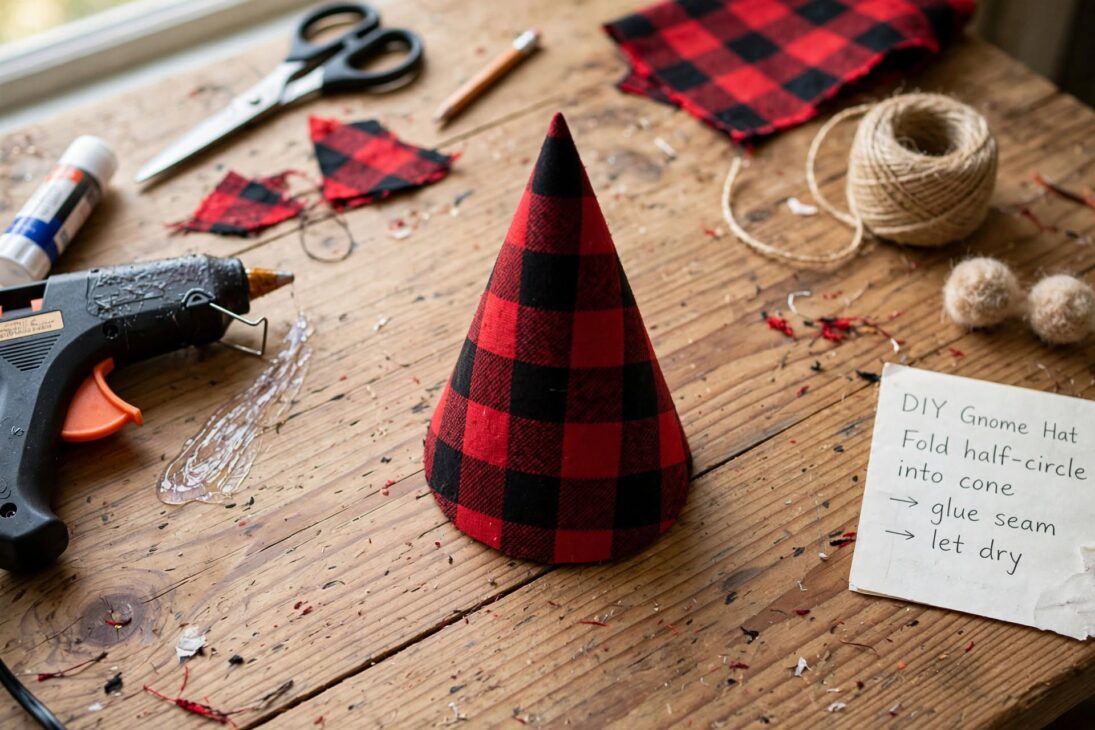
Turn the cone right side out if your fabric has a distinct front and back. Try it on the body to check the fit. It should slide down over the gathered top with a little room to spare, since you will tuck the nose and beard underneath it later.
Bend the tip of the hat forward or to one side to give your gnome some personality. A floppy, curled tip looks more playful, while a straighter tip looks more classic. Set the hat aside for now.
Step 3: Attach the Beard
Cut a piece of faux fur or a bundle of chunky yarn into a rough triangle or fan shape. This will sit just below where the nose goes, so hold it up against the body first to see how much length looks right.

If you are cutting faux fur, flip it fur side down and snip only through the backing fabric, not the fur itself. Cutting straight through the fur leaves an unnatural, blunt edge, while cutting the backing keeps the fur strands long and wispy.
Apply a line of hot glue along the top edge of the beard piece and press it onto the front of the body, just below where the nose will sit. Hold it in place for a few seconds until the glue sets. A common mistake here is gluing the beard too high, which leaves no room for the nose. Aim for the beard to start about a third of the way down the body.
Step 4: Glue On the Nose
Take your wooden bead and check that it sits flush against the body. If it has a flat back already, you are ready to go. If not, you can sand a small flat spot so it glues on securely instead of rolling around.
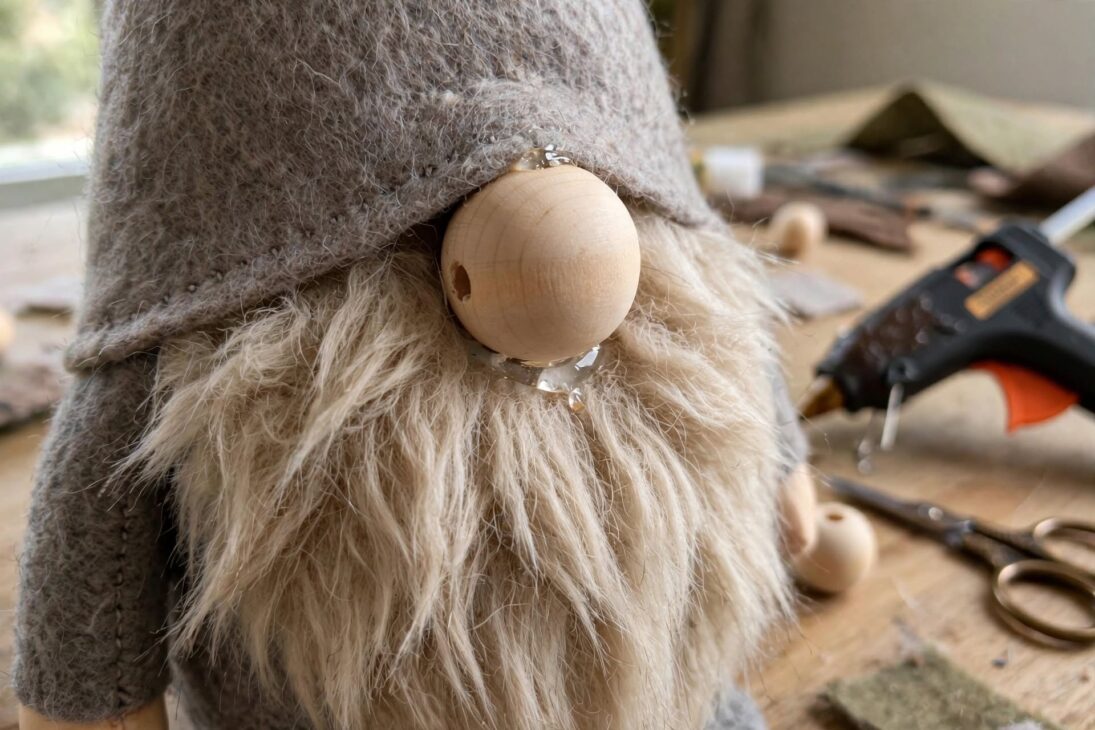
Add a generous dot of hot glue to the flat side of the bead and press it firmly onto the body, right where the top of the beard meets bare fabric. Hold it steady for about ten seconds, since a heavy bead can slide before the glue fully sets.
For extra hold, you can also glue the top edge of the nose to the inside rim of the hat once the hat goes on. That gives you two points of contact instead of one, which matters if your gnome will be handled or moved often.
Step 5: Add the Hat
Slide the finished hat down over the gathered top of the body. Line up the side seam of the hat with the back of the gnome so it sits straight, not twisted to one side.
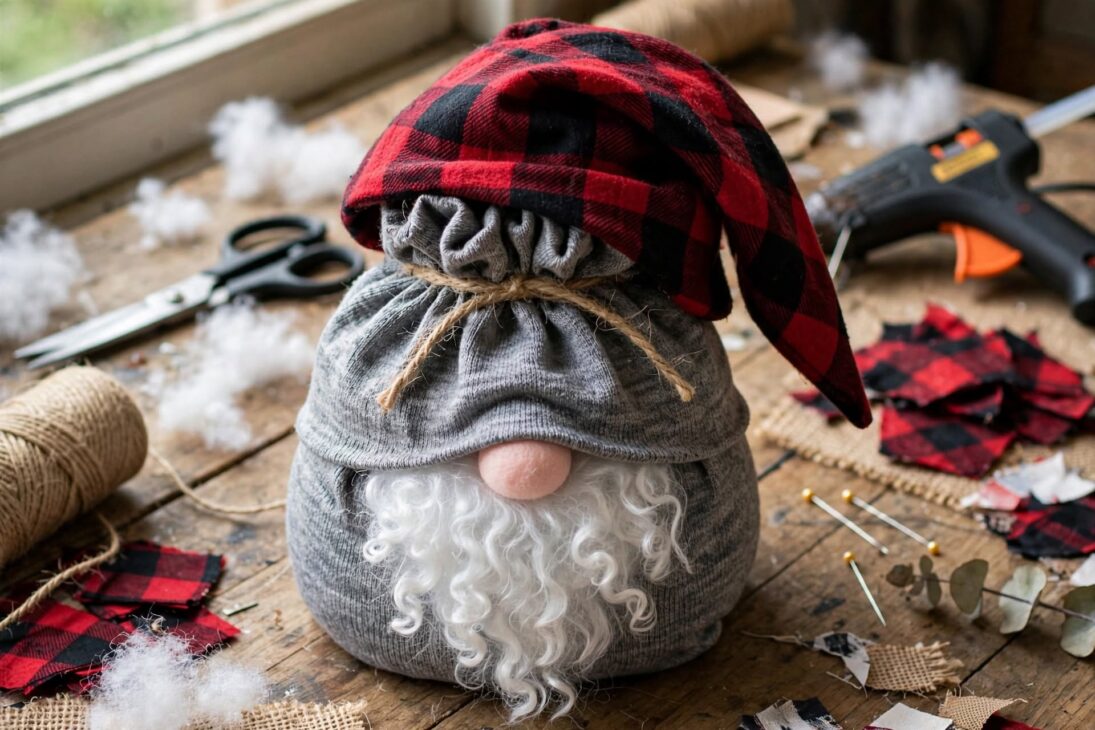
Run a thin bead of hot glue around the inside bottom edge of the hat, then press it down onto the body. Work in small sections rather than gluing the whole rim at once, since hot glue cools fast. Avoid getting glue on the very front of the hat near the nose, since you want that area to still tuck neatly around the beard.
Once the glue cools, give the tip of the hat one more bend or curl so it matches the shape you decided on in step two. This is also a good time to check that the nose sits centered under the hat brim.
Step 6: Trim and Tidy the Beard
Now that the nose and hat are in place, look over the beard and trim any strands that are too long or uneven. Keep the very center front slightly longer than the sides, since that gives the classic tapered gnome beard look.
If you used yarn instead of faux fur, this is also the point to comb it out a bit with your fingers so it looks fuller rather than flat. A common tip from experienced gnome makers is to trim a little at a time and step back often, since faux fur is much harder to fix once you cut too much off.
Step 7: Decorate and Personalize
This is the fun part. Add a strip of ribbon or trim around the base of the hat, glue on a jingle bell to the tip, or tuck a sprig of faux greenery into the crook of the arm if your gnome has one. Plaid, buffalo check, and knit sweater fabric are popular choices for a cozy, farmhouse style hat.
You can also give your gnome small mitten shaped hands or tiny felt boots peeking out from the bottom of the body for extra character. Keep embellishments light though, since too many small glued pieces can make the gnome top heavy or unstable.
Step 8: Display Your Gnome
Let the glue fully cool and set for about fifteen minutes before moving your gnome around too much. Once it is sturdy, find a spot for it on a mantel, a shelf, or as part of a table centerpiece with candles and greenery.
Gnomes look especially charming in a group, so consider making a few in different sizes and fabric combinations. Many crafters like to give each one a name, which makes them feel more like little holiday characters than plain decorations.
Sizes and Style Variations
Once you have made one gnome, it is easy to change up the size and style. A small gnome, made from a half sock or a six inch fabric circle, works well as an ornament or a place setting at the holiday table. A large gnome, built from a full length tube sock or a fabric circle closer to twelve inches, makes a bold statement piece on its own by the fireplace.
Fabric choice changes the whole feel of the finished gnome. A red and green plaid hat leans classic and traditional, while a knit sweater fabric or chunky cable knit gives a cozy, farmhouse look. Burlap and neutral linen tones work nicely for a more rustic, natural style that fits year round decor, not just the holidays.
You can also skip the fabric body altogether and use a glass jar, a wooden peg, or even an old light bulb as the base, then build the beard, nose, and hat around it the same way. This no stuffing method is a good option if you want your gnome to sit upright without any added weight, or if you are working with kids and want to avoid loose stuffing material.
Arms are another easy add on. Cut two small fabric strips, stuff them lightly, and glue one to each side of the body before the hat goes on. Bend them forward so the gnome looks like it is holding a small item, such as a mini pinecone, a wrapped gift, or a sprig of holly.
FAQ
Do I need to know how to sew?
No, you do not. This method relies on hot glue and simple ties instead of stitching, so a sewing machine and even hand sewing skills are optional. If you enjoy sewing, you can swap in a stitched seam anywhere glue is used for a sturdier finish.
What if my nose keeps falling off?
This usually means the glue did not fully bond before you let go. Sand a flat spot on the bead so it sits flush, use extra glue, and hold it firmly in place for a full ten seconds. A second glue point where the nose meets the hat rim adds extra security.
How long does the whole project take?
Most beginners finish one gnome in one to two hours, including cutting, gluing, and trimming the beard. Drying time for the glue is quick, usually just a few minutes between steps.
Can kids help with this project?
Yes, kids can help with stuffing the body, choosing fabric, and decorating once the pieces are assembled. Save the hot glue steps for an adult, since the glue gun tip stays hot enough to burn skin.
What can I use instead of a wooden bead for the nose?
A pom pom, a foam ball, or even a rolled up piece of felt all work well as substitutes. Choose something that is roughly round and firm enough to hold its shape once it is glued on.
Conclusion
Making a Christmas gnome comes down to five simple parts: a stuffed body, a bearded face, a wooden nose, and a pointed hat, all held together with hot glue. There is no sewing machine required, and most of the work is just cutting, stuffing, and gluing in the right order.
Once you make your first one, the process goes much faster the second time around. Try mixing up fabric patterns, hat shapes, and beard textures to build a whole little gnome family for your mantel this season.
References
- Sweet Red Poppy. “How to Make a Gnome: DIY Christmas Gnomes.” 2026.
- Amy Latta Creations. “Easy DIY Christmas Gnomes.” 2023.
- DIY Candy. “How to Craft DIY Christmas Gnomes for a Festive Touch.” 2026.
- Hoot Shack. “35 DIY Christmas Gnomes To Make.” 2023.

jessy
Jessy Grace has spent over 5 years researching and writing about household energy, covering everything from gas and electricity tariffs to appliance efficiency and smart meter technology. With a background in [energy consulting / utilities journalism / consumer finance], [he/she/they] specializes in breaking down complex tariff structures, regulatory changes, and cost-saving strategies into practical advice homeowners can actually use. [Author Name]'s work draws on data from official regulators, utility providers, and independent consumer bodies to ensure every guide is accurate and up to date. When not writing, [he/she/they] tests energy-saving products firsthand and stays close to industry shifts, from renewable tariffs to price cap changes, to keep readers ahead of the curve.