
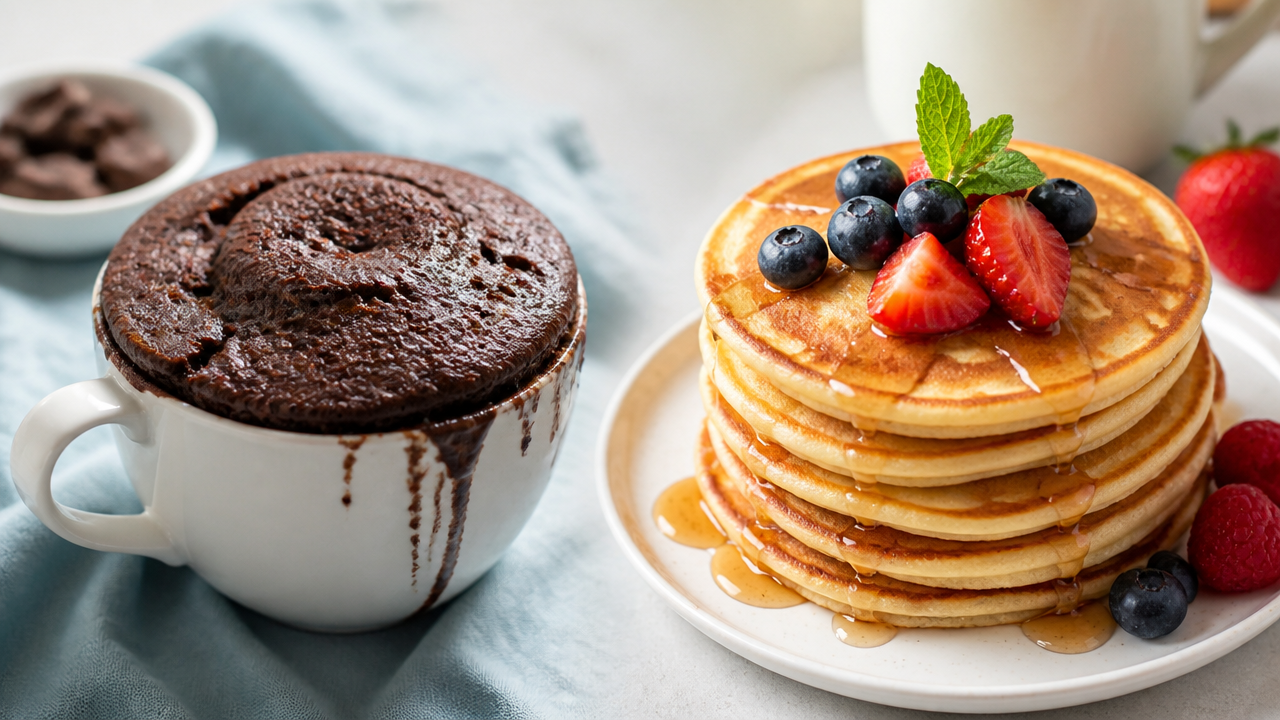
Want a dessert that’s ready in under 5 minutes, or breakfast pancakes without hunting for baking powder? Microwave cakes and baking-powder-free pancakes are both easier than you’d think. Whether you’re craving a quick chocolate mug cake for an unexpected craving or fluffy pancakes without chemical leaveners, these methods work with everyday ingredients and simple tools. The key is understanding how microwaves cook differently than traditional ovens, and how to create lift without commercial raising agents. Read on to master both techniques.
Quick Questions and Answers
Question: Can you make a microwave cake without baking powder? Most classic microwave cake recipes include baking powder or baking soda to help the cake rise. Without it, the cake may be dense and flat, though some recipes using eggs as a leavener can still work. For pancakes without baking powder, you can substitute yogurt, vinegar, or whipped eggs to create lift.
Question: Why does my microwave cake come out flat? A microwave cake turns flat if it lacks enough leavening agent like baking powder or if the cooking time is too short. Overmixing the batter can also deflate air bubbles needed for rising. Ensure you use the correct amount of baking powder and cook until the center is fully set.
Question: How long do you cook a classic microwave cake? A classic mug cake typically cooks in 70–90 seconds in a standard microwave, while larger microwave cakes may take 5–8 minutes. Cooking time varies by microwave wattage, so check with a toothpick; it should come out clean when the cake is done.
What You Need
| Item | Purpose | Notes |
|---|---|---|
| Microwave-safe mug or silicone mold | Cooking vessel | 11–12 oz capacity for mug cakes; silicone molds for full-size cakes |
| All-purpose or cake flour | Dry base | Cake flour yields finer crumb |
| Granulated sugar | Sweetener and texture | Artificial sweeteners work but use half the amount |
| Baking powder or baking soda | Leavening | Optional for some recipes; essential for traditional rise |
| Eggs | Binding and lift | Use fewer eggs to avoid omelet-like texture |
| Milk (dairy or plant-based) | Moisture | Almond, soy, or oat milk work equally well |
| Canola oil or melted butter | Fat and flavor | Oil creates more tender crumb in microwave cakes |
| Vanilla extract | Flavor | Optional but recommended |
| Cocoa powder | Flavor (chocolate cakes) | Dutch-process cocoa adds deeper flavor |
| Whisk or fork | Mixing | Thorough blending prevents lumps |
| Toothpick or cake tester | Doneness check | Gold standard for microwave baking |
Step 1: Gather Ingredients and Prepare Your Vessel

Start by choosing your cooking vessel. For a single-serving mug cake, a microwave-safe mug or ceramic bowl of 11–12 ounces works perfectly. For a full-size 8-inch cake, invest in a silicone bundt pan or round mold—silicone distributes heat more evenly than ceramic, preventing tough, rubbery edges. Measure out all your dry ingredients: flour, sugar, cocoa powder (if making chocolate), baking powder, and salt. Having everything ready before you mix prevents errors and speeds up the process.
Step 2: Mix Dry Ingredients

Pour flour, sugar, cocoa powder, baking powder, and salt directly into your mug or mixing bowl. Use a whisk or fork to combine thoroughly, breaking up any sugar lumps. This step is crucial because the microwave cooks so fast that lumps won’t dissolve during heating. Whisk for about 30 seconds until the mixture looks uniform and free of streaks. For chocolate mug cakes, whisk the cocoa in well to avoid bitter pockets.
Step 3: Add Wet Ingredients

Pour milk, canola oil, water (if your recipe calls for it), and vanilla extract into the dry mixture. Stir vigorously for about 1 minute until the batter is completely smooth. This is not the time to be gentle—you want to fully hydrate the flour and eliminate lumps. If you’re adding chocolate chips or other mix-ins, fold them in last with just a few stirs. Don’t worry if some batter clings to the edges of the mug; the cake will rise and fill those spaces.
Step 4: Microwave Your Cake
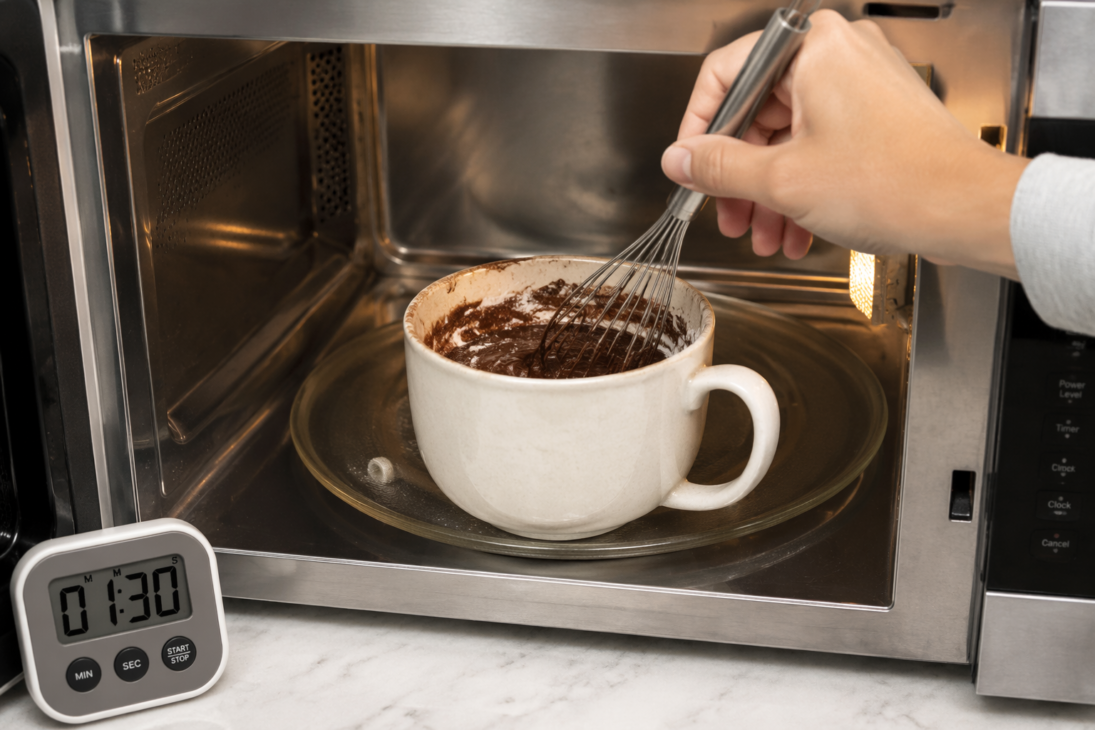
Place your mug or mold in the microwave on the highest power setting. For a standard 12-ounce mug cake, microwave for 70–90 seconds. For full-size cake layers in silicone molds, expect 3 to 4 minutes per layer. If your microwave is older or lower wattage (under 800W), add 30–60 seconds to the time. Start checking at the lower end; you can always add more time, but you can’t undo overcooking. The top should look set and spring back slightly when gently pressed.
Step 5: Test for Doneness
Remove the mug or mold carefully (the vessel will be hot). Insert a toothpick or cake tester into the center of the cake. If it comes out clean or with just a few moist crumbs, your cake is done. If batter still clings to the toothpick, return it to the microwave for 15–20 seconds and test again. This step is non-negotiable because the edges and top can look cooked while the center remains raw.
Step 6: Cool Before Serving or Frosting
Let your cake rest for 1–5 minutes in the mug or mold. This resting period allows the crumb structure to set and prevents the cake from being too hot or soggy. If you plan to frost it, let it cool to room temperature—about 15–20 minutes—so the frosting doesn’t melt. For mug cakes eaten straight from the mug, you can enjoy it warm or let it cool slightly for better texture.
How to Make Pancakes Without Baking Powder
Pancakes without baking powder rely entirely on aeration. Unlike microwave cakes that use chemical leaveners, these pancakes get their fluff from vigorous whisking and properly folded egg whites.
Step 7: Separate and Whip Egg Whites
Crack your eggs carefully, separating whites from yolks into two clean bowls—even a trace of yolk will prevent whites from reaching stiff peaks. Use an electric mixer or whisk by hand to beat the egg whites for about 3–4 minutes until they form stiff, glossy peaks. This is the backbone of your pancakes’ rise; don’t skip this step or rush it. The whites should look like meringue and hold their shape when you lift the whisk.
Step 8: Create Your Batter Base
In a separate bowl, combine flour, sugar, salt, milk, melted butter, and egg yolks. Whisk until just combined—lumps are okay here, unlike cake batter. A few flour streaks are fine; you want to avoid overdevelopment of gluten, which toughens pancakes. The batter should be thicker than cake batter but still pourable. If it seems too thick, add a splash more milk.
Step 9: Fold Egg Whites Into Batter
This is the critical step. Using a rubber spatula, gently fold the whipped egg whites into the batter in two additions. Fold slowly and deliberately, scooping from the bottom of the bowl and folding over the top. Stop as soon as no white streaks remain—overworking will deflate all those air bubbles you just created. The batter should look light and airy, with visible pockets of egg white foam.
Step 10: Heat Your Skillet
Place a non-stick skillet or griddle over medium-low heat. Medium-low is important here because you want the bottoms to set slowly, giving the pancakes time to rise before you flip them. Let it heat for 2–3 minutes. You can test readiness by sprinkling a few drops of water on the surface—they should sizzle gently and evaporate, not dance or pop violently.
Step 11: Cook the First Side
Pour or ladle batter onto the hot skillet, making pancakes about 4 inches across (smaller pancakes are easier to flip). Let them cook undisturbed until bubbles form on the surface and the edges look set and slightly dry—about 2–3 minutes. This patience is everything; flipping too early traps steam and causes the pancake to collapse. Watch for the bubble pattern; when most of the top surface is covered with bubbles, you’re ready.
Step 12: Flip and Finish
Flip each pancake once and cook the second side for another 1–2 minutes until golden brown. Resist the urge to flip multiple times—each flip risks deflating your carefully aerated batter. The second side cooks faster than the first because the pancake is already warm inside. Transfer finished pancakes to a warm plate and serve immediately with your favorite toppings.
| Method | Leavening Source | Texture | Cooking Time | Best For |
|---|---|---|---|---|
| Microwave cake with baking powder | Chemical (baking powder/soda) | Light, fluffy, uniform crumb | 70–90 seconds (mug) or 3–4 minutes (full-size) | Quick desserts, mug cakes, last-minute treats |
| Microwave cake with fewer eggs | Minimal chemical + egg proteins | Denser than traditional, less omelet-like | 80–100 seconds | Single servings, avoiding egg-heavy flavor |
| Pancakes with baking powder | Chemical (baking powder) | Standard fluffy stack | 3–4 minutes total | Traditional weekday breakfast |
| Pancakes without baking powder (whipped whites) | Aeration + egg foam | Extremely light and tall | 5–6 minutes total | Baking-powder-free diets, maximum fluff |
| Pancakes with yogurt or vinegar | Acid + baking soda | Light with tangy note | 4–5 minutes total | Dairy-free or flavor variations |
Tips
Microwave wattage matters more than you’d think. A 1000W microwave cooks noticeably faster than a 600W model—sometimes twice as fast. If your first cake turns out dense, check your microwave’s wattage (usually on a label inside or on the back). Lower wattage means you should increase cooking time by 30–60 seconds.
Use a microwave-safe silicone mold for full-size cakes instead of ceramic. Silicone conducts heat more evenly, preventing the rubbery edges that plague ceramic-baked versions. Silicone also doesn’t need greasing in most cases, saving cleanup time.
Don’t overmix pancake batter once you’ve folded in the egg whites. Every additional stir deflates your aeration work. A few lumps in the batter won’t affect the final pancake—they’ll actually help keep it tender.
Cold ingredients work against you in microwave baking. Use room-temperature milk, eggs, and butter for more even cooking. Cold batter heats unevenly, creating raw centers and overdone edges.
For pancakes, medium-low heat is your friend. High heat creates burnt bottoms and raw insides. Patience on the first side—waiting for that full bubble pattern—makes a huge difference in height and evenness.
Recipe Card
Classic Microwave Mug Cake
A single-serving chocolate cake ready in under 2 minutes, made entirely in a microwave-safe mug with pantry staples.
Prep: 3 minutesCook: 80 secondsTotal: 5 minutesYield: 1 servingCategory: DessertCuisine: American
Ingredients
- 1/4 cup all-purpose flour
- 1/4 cup granulated sugar
- 2 tablespoons unsweetened cocoa powder
- 1/8 teaspoon baking soda
- Pinch of salt
- 1/4 cup whole milk
- 2 tablespoons canola oil
- 2 tablespoons water
- 1/4 teaspoon vanilla extract
- Pinch of chocolate chips (optional)
Instructions
- In a microwave-safe mug (11–12 oz capacity), whisk together flour, sugar, cocoa powder, baking soda, and salt.
- Stir in milk, canola oil, water, and vanilla extract until smooth. Fold in chocolate chips if using.
- Microwave on high for 70–90 seconds, checking at 70 seconds with a toothpick for doneness.
- Let cool for 2 minutes before serving or frosting.
Nutrition Info (per serving)
| Calories | 320 |
| Protein | 6g |
| Carbs | 38g |
| Fat | 16g |
| Fiber | 1g |
| Sugar | 28g |
| Sodium | 285mg |
Notes
- Cooking time varies by microwave wattage; adjust by 15–30 seconds if needed.
- For dairy-free, substitute almond or soy milk in equal amounts.
- Reduce sugar by half if using artificial sweetener, as sweeteners lack structural properties of granulated sugar.
My Experience With Classic Microwave Cake Recipe and Pancakes Without Baking Powder Recipe
I started experimenting with microwave cakes out of pure desperation—a friend’s birthday came up on a Tuesday night, and I had no oven access. That first mug cake came out almost inedibly rubbery. Turns out I’d used way too many eggs and didn’t realize my microwave ran at 600W, not the 1000W most recipes assume. After a few trial runs, I cracked the code: fewer eggs, precise wattage awareness, and that toothpick test are everything.
Pancakes without baking powder were a different challenge. I tried whipping egg whites once and immediately deflated them by overmixing the batter. The real skill is in the restraint—folding gently, cooking at medium-low, and resisting the urge to flip before those bubbles fully break the surface. When I finally got it right, the pancakes were taller and airier than anything I’d made with baking powder. The texture is genuinely different, almost cloud-like if you nail the technique.
Here’s what surprised me most: microwave cakes aren’t a hack or compromise. They’re genuinely good if you respect the constraints. The short cooking time locks in moisture, which is why they’re often softer than oven-baked versions. Pancakes without leavening agents? They prove you don’t need chemistry to get height—just patience and proper technique. Have you tried either of these methods, and if so, what was your biggest hurdle?
FAQ
Q: What ingredients are needed for a microwave mug cake?
Basic ingredients include all-purpose flour, sugar, baking powder, salt, milk, melted butter or oil, and vanilla extract. Some recipes add cocoa powder for chocolate flavor or sprinkles for decoration. Mix dry ingredients first, then wet, until smooth before microwaving. For best results, use room-temperature milk and eggs so the batter heats evenly throughout the microwave cycle.
Q: Are microwave cakes healthy compared to regular cakes?
Microwave cakes are often smaller and use less butter and sugar than traditional cakes, making them slightly lower in calories. However, they still contain refined flour and sugar. Using whole wheat flour, reducing sugar, or adding fruits can improve their nutritional value. A single-serving mug cake typically contains 300–400 calories depending on fat content.
Q: Does microwave cooking time depend on wattage?
Yes, cooking time for microwave cakes varies significantly with wattage. Higher wattage microwaves cook faster, while lower wattage ones need more time. For example, a 1000W microwave may take 70–90 seconds for a mug cake, while a 600W unit could need 2–3 minutes. Always check your microwave’s wattage (usually on the back or inside label) and adjust timing accordingly.
Q: Can I use a metal pan in the microwave for cake?
No, you should never use metal pans in a microwave as they can cause dangerous sparks and damage the appliance. Use microwave-safe silicone molds, ceramic mugs, or glass dishes instead. Silicone bakeware often doesn’t need greasing, making cleanup easier. For full-size cakes, silicone bundt pans provide the most even heat distribution and prevent rubbery edges.
Q: What is the best way to know if a microwave cake is done?
The cake is done when a toothpick inserted in the center comes out clean and there are no wet batter spots. The surface should spring back when gently pressed. Avoid overcooking, which can make the cake crumbly, or undercooking, which leaves it soggy. This toothpick test applies equally to mug cakes and full-size microwave layers.
Q: Do I need to let a microwave cake rest before eating?
Yes, letting a microwave cake rest for 1–5 minutes after cooking helps it set and improves texture. This prevents the cake from being too hot or soggy. Cooling completely is essential before frosting to avoid melting the topping. For mug cakes eaten straight from the vessel, even 2–3 minutes of rest makes a noticeable texture difference.
Q: Which leavening agent works best in microwave cakes?
Baking powder is the most common and effective leavening agent for microwave cakes, providing quick rise in the short cooking time. Baking soda can also work if paired with an acidic ingredient like milk or lemon juice. Eggs alone may not provide enough lift for a fluffy result, though whipped egg whites are essential for baking-powder-free pancakes. For traditional microwave cakes, baking powder delivers the most consistent rise and tender crumb.
2026 Trends
Microwave baking has gained traction as a sustainability practice—shorter cooking times mean less energy consumption compared to preheating and running a full oven. Plant-based milks dominate recipe variations in 2026, with oat and soy milk replacing dairy in most microwave cake recipes. Pancakes without chemical leaveners align with the clean-label movement, where home cooks prioritize ingredient transparency and minimal additives. Silicone bakeware popularity continues to rise due to durability and reduced plastic waste compared to single-use paper liners.
Conclusion
Microwave cakes and pancakes without baking powder are both achievable with the right technique and understanding of how these cooking methods differ from traditional baking. The key to success lies in precise measurement, respecting your microwave’s wattage, and using the toothpick test as your gold standard for doneness. For pancakes, aeration through whipped egg whites replaces chemical leaveners entirely—it’s a skill worth mastering.
Start with a single-serving mug cake to understand your microwave’s timing, then graduate to larger silicone molds for full-size desserts. For pancakes, invest time in learning the bubble-break pattern before flipping; that one visual cue transforms your results. Both methods reward patience and precision, and both deliver impressive results in a fraction of traditional cooking time.
References
- Something Swanky. (n.d.). Microwave cake recipe: Easy chocolate mug cake. https://www.somethingswanky.com/microwave-mug-cake-recipe/
- WikiHow. (n.d.). How to make cake in the microwave: 2 fun & foolproof recipes. https://www.wikihow.com/Make-Cake-in-the-Microwave
- Tastes Better From Scratch. (n.d.). Vanilla mug cake. https://tastesbetterfromscratch.com/vanilla-mug-cake/
- AllRecipes. (n.d.). Easy microwave chocolate mug cake recipe (with video). https://www.allrecipes.com/recipe/241038/microwave-chocolate-mug-cake/
- AllRecipes. (n.d.). Microwave cake recipe. https://www.allrecipes.com/recipe/7285/microwave-cake/
- In the Kitchen with Matt. (n.d.). Chocolate mug cake | Only 3 ingredients. https://www.inthekitchenwithmatt.com/chocolate-mug-cake
- Pinch of Taste Recipes. (n.d.). Microwave oven cake recipe | Quick, fluffy, moist dessert. https://www.pinchoftasterecipes.com/microwave-oven-cake-recipe/
- Simply Recipes. (n.d.). Birthdays just got easier with this 3-layer cake in the microwave! https://www.simplyrecipes.com/3-layer-cake-in-the-microwave-recipe-7109104
