
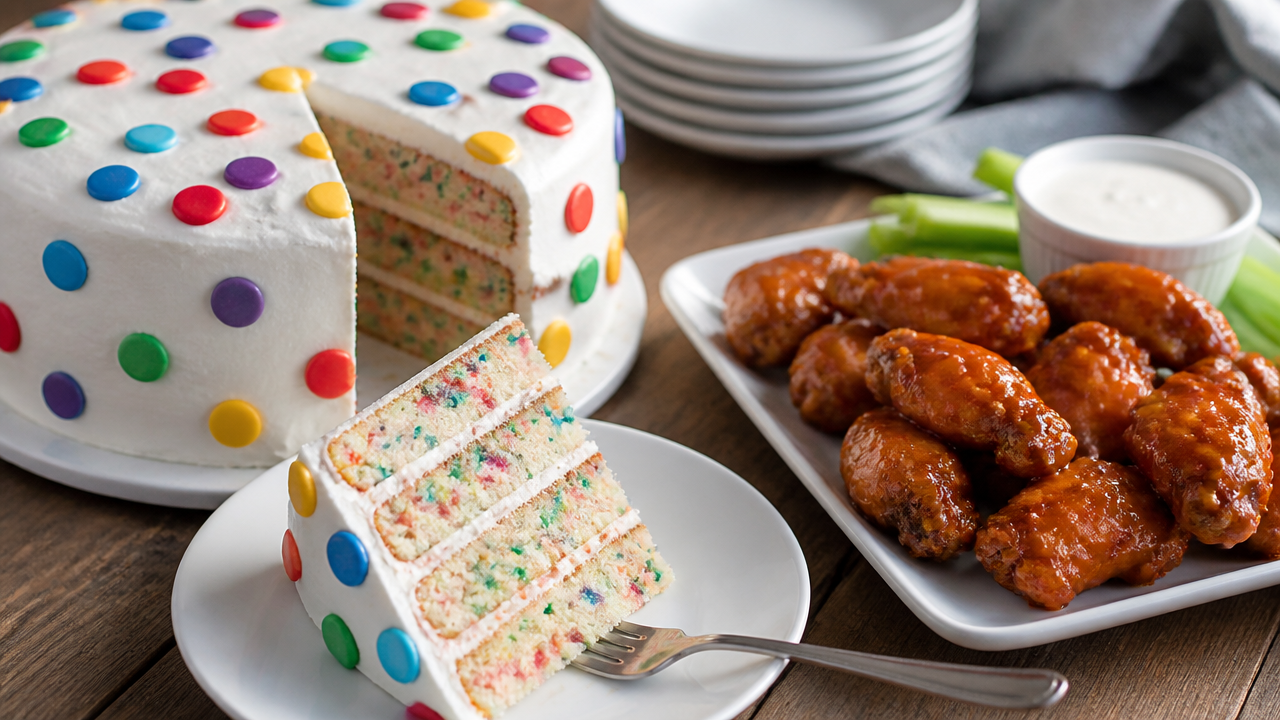
Want to know what makes a truly great dot cake stand out from every other sprinkle-topped treat you’ve tried? Dot cakes are those adorable, Instagram-famous mini cakes that combine a fluffy vanilla base with smooth buttercream and a signature edge-to-edge coat of rainbow nonpareils. Whether you’re planning a birthday party, putting together gift boxes, or just looking for a fun weekend baking project, dot cakes deliver serious visual appeal with surprisingly minimal effort. The homemade version tastes fresher than store-bought, costs less, and takes roughly an hour from start to finish. Ready to make your own?
Quick Questions and Answers
Question: Why are dot cakes called dot cakes and so popular? Dot cakes are named for their signature all-over sprinkle coating that creates a colorful ‘dot’ crust when the frosted cake is dunked into sprinkles. They became viral because they are mini, individual servings that are quick to make, visually fun, and perfect for parties or gifts.
Question: Can you make dot cakes without ramekins? Yes, you can bake the batter in a standard 9×13 inch pan, then cut out rounds to fit into ramekins, small cups, or even gift boxes after baking. Alternatively, grease and line small sandwich tins or muffin trays to create individual mini cakes without traditional ramekins.
Question: Do dot cakes need cream cheese frosting? While cream cheese frosting is common in viral recipes for its tangy balance to sweet sprinkles, you can use vanilla buttercream, whipped cream, or any favorite frosting. The key is using a frosting that is smooth and slightly sticky so the sprinkles adhere well.
Key Takeaways
Making dot cakes at home is faster and cheaper than buying them. The process breaks into five simple stages: baking the cake, making buttercream, cutting rounds, frosting, and applying sprinkles. Buttercream texture matters most—it needs to be smooth and firm enough to hold the sprinkles without sliding. Store finished cakes refrigerated for up to 3 days. Once you nail the basic vanilla version, you can experiment with chocolate cake, different frostings, or layered stacks inside the containers.
What You Need
| Item | Purpose | Notes |
|---|---|---|
| Vanilla sheet cake (pre-baked and cooled) | Structural base of the cake | Homemade or box mix works; ensure it is fully cooled before cutting |
| 3-inch circular cake cutter or biscuit cutter | Creates uniform cake rounds | Must be clean and sharp to avoid ragged edges |
| Ramekins or small circular containers | Holds the cake and frosting | 8 oz ramekins are standard; glass or ceramic work best |
| Rainbow nonpareils | Signature sprinkle finish | Buy in bulk; you need a generous layer |
| Buttercream ingredients (butter, icing sugar, milk, vanilla, salt) | Frosting layer between cake and sprinkles | Use unsalted butter at room temperature |
| Small offset spatula or flat-edged spoon | Levels the frosting surface | Ensures even coverage when applying sprinkles |
| Shallow plate or wide bowl | Holds the sprinkles for dipping | Must be wide enough to accommodate the ramekin rim |
Step 1: Bake and Cool Your Vanilla Sheet Cake

Start with a fresh vanilla sheet cake. You can bake from scratch using a standard cake recipe, or use a quality box mix if you prefer speed over scratch-baking. Pour the batter into a greased 9×13 inch pan and bake according to package directions (typically 30–35 minutes at 350°F until a toothpick comes out clean). Let the cake cool completely in the pan—this usually takes 1–2 hours at room temperature. Rushing this step causes the cake to crumble when you cut it, so patience here pays off.
Once cooled, you can frost it in the pan if layered cakes appeal to you, or cut it into rounds right away. The cake should be firm enough to hold together but still tender. If it seems fragile, refrigerate it for 30 minutes before cutting.
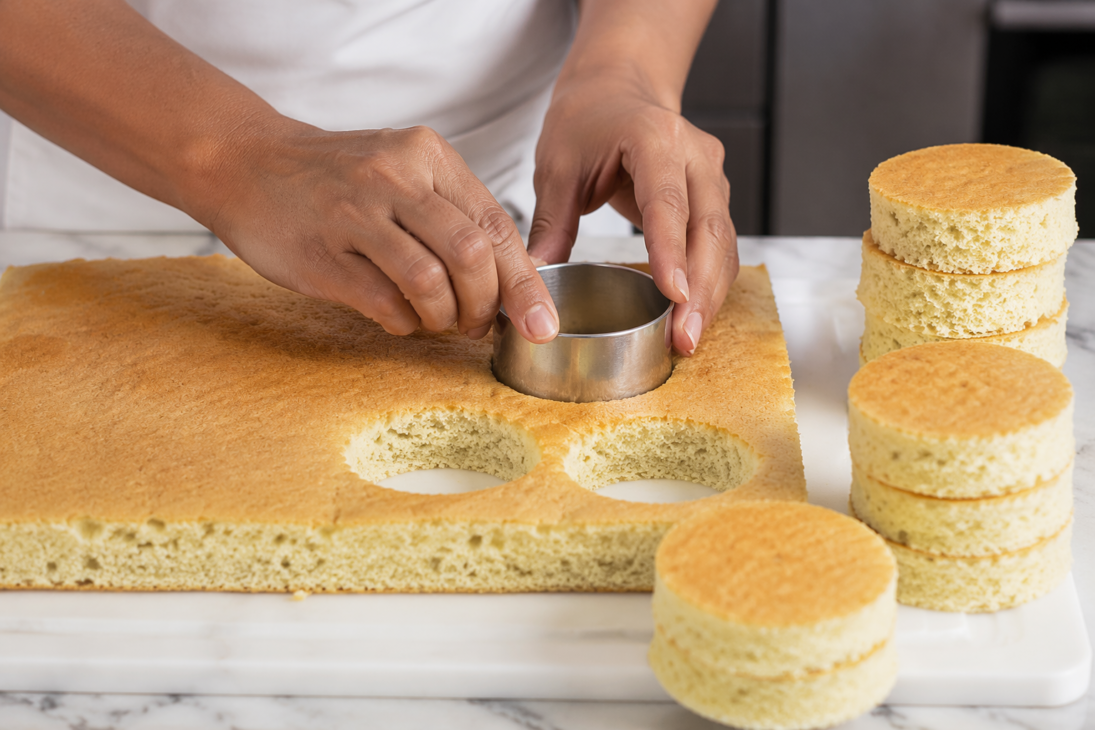
Step 2: Cut Cake Rounds Using a 3-Inch Cutter

Place your cooled sheet cake on a clean, flat surface. Using a 3-inch circular cutter (a biscuit cutter or cookie cutter works perfectly), press straight down through the cake in a swift, firm motion. Lift the cutter straight up—do not twist or wiggle, as that damages the edges. You should get roughly 8 to 10 rounds depending on how tightly you space them. Save the scraps; you can crumble them for a trifle or snack.
Lay out your ramekins in a row. Drop one cake round into the bottom of each container. If you want thicker, more decadent cakes, stack two rounds—one directly on top of the other—without frosting between them. For layered cakes with frosting between rounds, add a thin layer of buttercream after the first round, then top with a second round.
Step 3: Make the Buttercream Frosting

Buttercream texture is the make-or-break element. According to King Arthur Baking, the frosting must be smooth, firm, and sticky enough to hold the sprinkles. Start with unsalted butter at room temperature—if it’s cold, the frosting will be lumpy.
Cut 1 pound (4 sticks) of butter into chunks and place in a stand mixer bowl. Beat on medium-high speed for 2 minutes until the butter is pale and fluffy. Sift 4 cups of powdered icing sugar into a separate bowl (sifting removes lumps). Reduce the mixer to low speed and add the sifted sugar in 4 separate batches, allowing each batch to fully incorporate before adding the next. This prevents clouds of sugar from flying everywhere and ensures a smooth result.
Once all sugar is mixed in, add 4 to 5 tablespoons of whole milk and 2 teaspoons of vanilla extract. Turn the mixer back to medium-high speed and beat for 3 more minutes until the frosting reaches stiff peaks and feels creamy. If it looks too thin, add a touch more powdered sugar. If it’s too stiff, add milk one tablespoon at a time.
Step 4: Frost Each Cake Round Smoothly
Using a small offset spatula or the back of a spoon, dollop a generous amount of buttercream onto the top of each cake round. Spread it evenly across the surface, then smooth it level with the top rim of the ramekin. This flat surface is critical—lumps or peaks will catch on the sprinkles unevenly.
Take your time here. The frosting should be at room temperature; if it’s too cold from the refrigerator, it becomes difficult to spread. If it’s too warm, it will slide off. Aim for a thickness of about ½ inch of frosting on top. Press the offset spatula gently across the surface a few times to ensure it’s as flat and level as possible.
Step 5: Apply the Signature Rainbow Sprinkle Coating
Pour a thick, generous layer of rainbow nonpareils onto a shallow plate or into a wide, flat bowl. The layer should be at least ¼ inch deep—thick enough to fully coat the frosting when you invert. If the nonpareil layer is too thin, sprinkles won’t stick evenly.
Hold the ramekin firmly by its sides and invert it directly onto the plate of sprinkles. Press gently but firmly for about 2 to 3 seconds to ensure the nonpareils adhere to every edge of the frosting. Lift the ramekin straight up slowly and carefully. The nonpareils should cling to the entire frosted surface, creating that signature “dot” pattern.
If you notice bare spots, you can press the exposed frosting into a small handful of sprinkles and place them gently on the gap. Most of the time, one full inversion does the job perfectly.
Step 6: Chill and Set Before Serving
Slide the finished dot cakes into the refrigerator for at least 1 to 2 hours before serving. This chilling time allows the frosting to harden and the sprinkles to set firmly. Cold cakes are also easier to handle and slice cleanly if you want to photograph them or gift them in boxes.
You can make dot cakes up to 3 days ahead and store them in an airtight container in the refrigerator. They also freeze well for up to 2 weeks if wrapped individually in plastic wrap. Allow them to come to room temperature for about 15 minutes before serving for the best texture and flavor.
Recipe Card
Quick and Easy Dot Cake Recipe
Individual mini cakes topped with fluffy buttercream and colorful rainbow sprinkles. Perfect for parties, gifts, or a fun baking project.
Prep: 20 minutesCook: 35 minutesTotal: 1 hour 55 minutesYield: 8 dot cakesCategory: DessertCuisine: American
Ingredients
- 1 box vanilla cake mix (or homemade vanilla cake batter)
- Water and eggs as directed on cake mix box
- 1 pound unsalted butter, room temperature
- 4 cups powdered icing sugar
- 4 to 5 tablespoons whole milk
- 2 teaspoons vanilla extract
- Pinch of salt
- 2 cups rainbow nonpareils
Instructions
- Preheat oven to 350°F. Prepare a 9×13 inch cake pan with non-stick spray.
- Mix cake batter according to package directions and pour into prepared pan.
- Bake for 30–35 minutes until a toothpick inserted in the center comes out clean. Allow to cool completely.
- Using a 3-inch circular cutter, press straight down through the cooled cake to create 8 rounds. Place one round into each 8 oz ramekin.
- In a stand mixer, beat butter on medium-high speed for 2 minutes until pale.
- Reduce speed to low and add sifted powdered sugar in 4 batches, mixing until fully incorporated after each addition.
- Add milk, vanilla extract, and salt. Beat on medium-high speed for 3 minutes until frosting reaches stiff peaks.
- Dollop frosting onto each cake round and smooth level with the rim of the ramekin using an offset spatula.
- Pour rainbow nonpareils into a shallow plate in a generous ¼-inch layer.
- Invert each frosted ramekin onto the plate of sprinkles and press gently for 2–3 seconds.
- Lift the ramekin straight up to reveal the sprinkle-coated frosting.
- Refrigerate finished cakes for 1–2 hours before serving.
Nutrition Info (per serving)
| Calories | 420 |
| Protein | 3g |
| Carbs | 58g |
| Fat | 20g |
| Fiber | 0g |
| Sugar | 52g |
| Sodium | 180mg |
Notes
- If making ahead, store in an airtight container refrigerated for up to 3 days.
- For layered dot cakes, stack two cake rounds with a thin layer of frosting between them.
- Experiment with chocolate cake, red velvet, or lemon as the base.
Tips
Frosting consistency is everything. If your buttercream is grainy or lumpy, it almost always means the butter was too cold or the sugar wasn’t sifted. Always start with softened butter and sift the powdered sugar. Lumps will show through the sprinkles.
Use a wide plate for sprinkles. A narrow bowl forces the edges of the ramekin to drag on the sides, which can knock off sprinkles. A wide, shallow plate gives you room to work.
Chill the frosting before inverting if the kitchen is warm. Warm frosting can slide or not hold sprinkles well. If your kitchen is above 75°F, pop the frosted cakes in the fridge for 15 minutes before the sprinkle step.
Invest in quality nonpareils. Cheap sprinkles can taste stale or flavorless. Brands like Wilton and Fancy Sprinkles hold their color and flavor better. Buy in bulk if you plan to make these often.
Cut cake rounds cleanly. A dull cutter will crumble the cake. Keep your cutter clean and use a firm, downward press. If the edges tear, you can patch them with a bit of frosting once the cake is in the ramekin.
Don’t skip the chilling step. Warm frosting and sprinkles don’t set properly. Refrigeration ensures a stable structure and cleaner slices if the recipient wants to cut the cake in half.
FAQ
Q: How long does it take to make dot cakes from scratch?
Making dot cakes from scratch takes about 45–60 minutes, including 20–35 minutes of baking time and 10–20 minutes for cooling and frosting. The assembly with sprinkles adds just a few minutes, making them one of the quickest decorated cakes.
Q: Are dot cakes similar to sprinkle cakes or funfetti?
Dot cakes are a type of sprinkle cake where the entire top is covered in sprinkles, unlike Funfetti which has sprinkles baked inside the batter. The dot cake’s signature is the external ‘dot’ crust created by pressing frosted cupcakes into a bowl of sprinkles.
Q: What oven temperature is best for baking dot cakes?
The best oven temperature for dot cakes is 350°F (175–180°C). Bake in ramekins for 20–22 minutes or in a 9×13 pan for 30–35 minutes until a toothpick comes out clean or has a few crumbs.
Q: Will dot cakes stay fresh if I make them ahead?
Dot cakes stay fresh for 2–3 days if stored in an airtight container at room temperature or refrigerated. For best texture and cleaner slices, refrigerate them for 1–2 hours before serving, which also helps the frosting and sprinkles set.
Q: How many servings does a dot cake recipe make?
A standard batch using 4 ramekins (8 oz each) makes 4 individual dot cakes. A 2-serving recipe uses smaller pans and yields just 2 cakes, while a 9×13 pan batch can be cut into 8–12 mini rounds depending on size.
Q: Is there a quick way to decorate dot cakes with sprinkles?
Yes, spread frosting evenly on each cake, then place sprinkles on a plate or in a bowl and press the frosted top gently into them. You can also dump all sprinkles in a bowl and press the cake face down for an even, quick coat.
Q: What ingredients are needed for the easiest dot cake batter?
The easiest batter uses flour, sugar, baking powder, baking soda, salt, butter, oil, egg whites, milk or buttermilk, and vanilla. Alternating dry and wet ingredients and mixing just until combined ensures a light, fluffy texture.
My Experience With Quick and Easy Dot Cake Recipe So Fun So Easy Chicken Wing Sauce
I’ve made these dot cakes dozens of times now, and honestly, they’re foolproof once you get the buttercream right. The first batch I made went sideways because I didn’t sift the powdered sugar—total rookie move. The frosting was gritty and the sprinkles wouldn’t stick properly. Once I fixed that, everything clicked.
What surprised me most is how forgiving the actual cake component is. You can use a box mix, leftover cake scraps, or bake from scratch, and nobody will know the difference once the frosting and sprinkles hit. The real magic happens in the buttercream and that moment when you flip the ramekin into the sprinkles. There’s something deeply satisfying about watching the nonpareils coat the frosting perfectly in one smooth motion.
The chilling step matters more than you’d think. Cold frosting holds the sprinkles better and looks cleaner. I’ve tried serving them warm, and the sprinkles start sliding off within an hour. Cold them first, always.
People love these because they’re Instagram-perfect but genuinely taste good—not just pretty. Texture-wise, they strike a nice balance between a tender crumb and firm frosting. Storage-wise, they last three days refrigerated without drying out.
Have you tried making dot cakes before, or is this your first time giving them a shot?
Conclusion
Dot cakes are one of those desserts that look far more complicated than they actually are. The viral appeal makes sense: they’re visually stunning, individually portioned, easy to gift, and genuinely fun to make. With a basic vanilla cake, buttercream frosting, and rainbow nonpareils, you have everything you need to create bakery-quality treats in your own kitchen.
The process moves quickly once you’ve gathered your ingredients and baked the cake base. Buttercream takes maybe 10 minutes, assembly is another 15 to 20 minutes, and the hardest part is simply waiting for them to chill. The result is absolutely worth the minimal effort.
Whether you’re baking for a party, preparing gifts, or just looking for a satisfying weekend project, dot cakes deliver impressive results every time. Start with vanilla, get comfortable with the technique, and then branch out into chocolate cake, different frostings, or stacked layers. The foundation is simple enough that variations flow naturally.
References
- King Arthur Baking. (2026, June 17). How to make Dot Cakes at home. https://www.kingarthurbaking.com/blog/2026/06/17/how-to-make-dot-cakes-recipe
- Not Quite Nigella. (2026, June 1). Viral Dot Cake Recipe (TikTok’s Famous Sprinkle Cake). https://www.notquitenigella.com/2026/06/01/dot-cakes-viral/
- Kitchen by the Sea. (n.d.). Viral Dot Cake Recipe (Easy Homemade Version). https://kitchen-by-the-sea.com/dot-cakes/
- Lily P Crumbs. (2026, May). Homemade Viral Dot Cakes Recipe. https://lilypcrumbs.com/2026/05/homemade-dot-cakes-recipe/
- Magic of Spice. (n.d.). Dot Cake Recipe: 7 Proven Steps for Viral Sprinkle Cups. https://www.magicofspice.com/dot-cake-recipe/
- YouTube. (n.d.). How to Make the NEW Viral Dot Cakes! 🍓✨ (Easy Step-by-Step Recipe). https://www.youtube.com/watch?v=2dD2xn1n2mQ
- Just a Taste. (n.d.). Homemade Dot Cakes (a.k.a. Cocktail Cakes). https://www.justataste.com/homemade-dot-cakes-recipe/
- Chef YoYo. (n.d.). Simple Homemade Dot Cake for 10 Cakes. https://chefyoyo.com/recipes/simple-homemade-dot-cake/
