
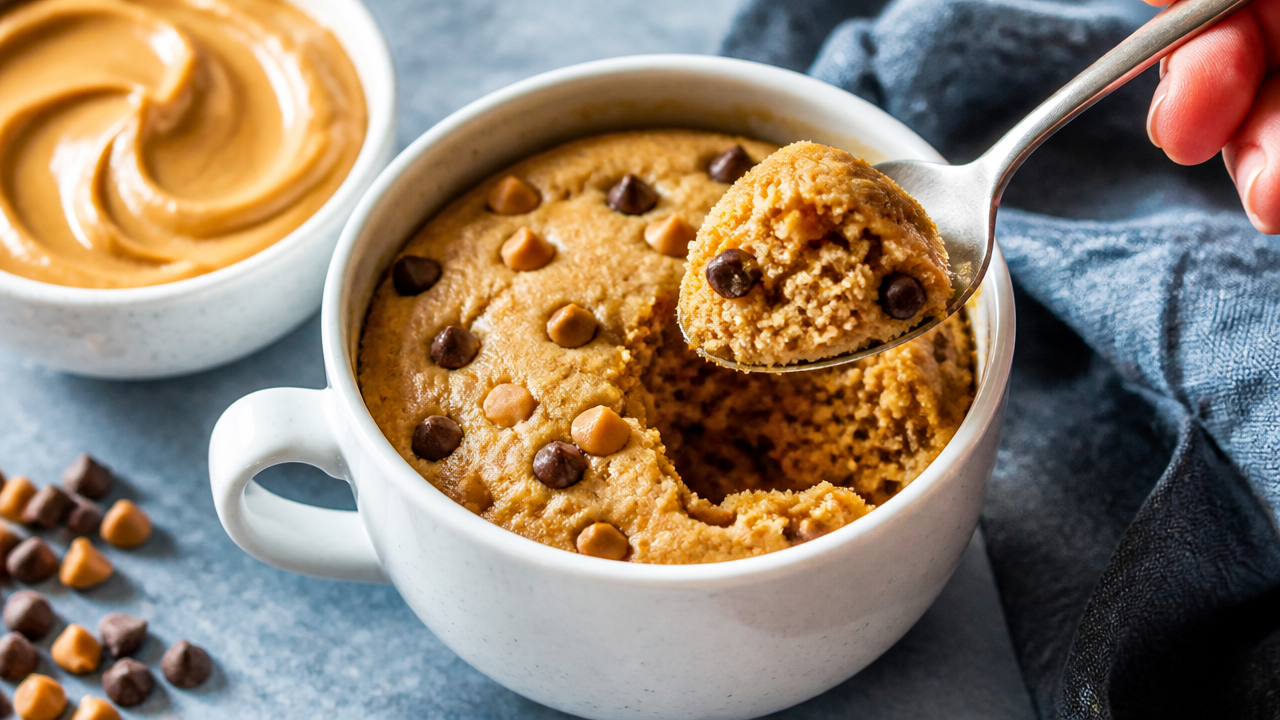
What makes a truly great peanut butter mug cake stand out from every other microwave dessert you’ve tried? The answer lies in balancing moisture, texture, and that unmistakable peanut butter flavor—all in a single mug. Whether you’re craving a quick weeknight treat, planning an after-dinner indulgence for a dinner party, or just want something satisfying without heating up the oven, peanut butter mug cake delivers in minutes. This single-serve dessert uses simple pantry staples to create a soft, fudgy cake that rivals full-sized versions. Ready to master this 60-second dessert? Let’s walk through the exact technique.
Quick Questions and Answers
Question: Why does my peanut butter mug cake come out dry? Your mug cake comes out dry because it was overcooked in the microwave. Most recipes recommend cooking for 45 to 90 seconds, and if done too long, the texture becomes crumbly. Check it after 30 seconds if your microwave runs hot, and stop cooking just until the top springs back when poked to keep it moist.
Question: Can I make a peanut butter mug cake without eggs? Yes, you can make an eggless peanut butter mug cake by substituting milk for the egg white, though the texture is slightly better with the egg. Many vegan versions use almond milk and maple syrup instead of eggs, resulting in a fudgy, moist cake that still rises well in the microwave.
Question: Do I need flour for a peanut butter mug cake? Flour is commonly used in standard recipes, but you can make a flourless version using just peanut butter, sugar, and an egg. This 3-ingredient flourless cake is naturally gluten-free and dairy-free, requiring only a whisk and a microwave to create a quick, simple dessert.
What You Need
| Item | Purpose | Notes |
|---|---|---|
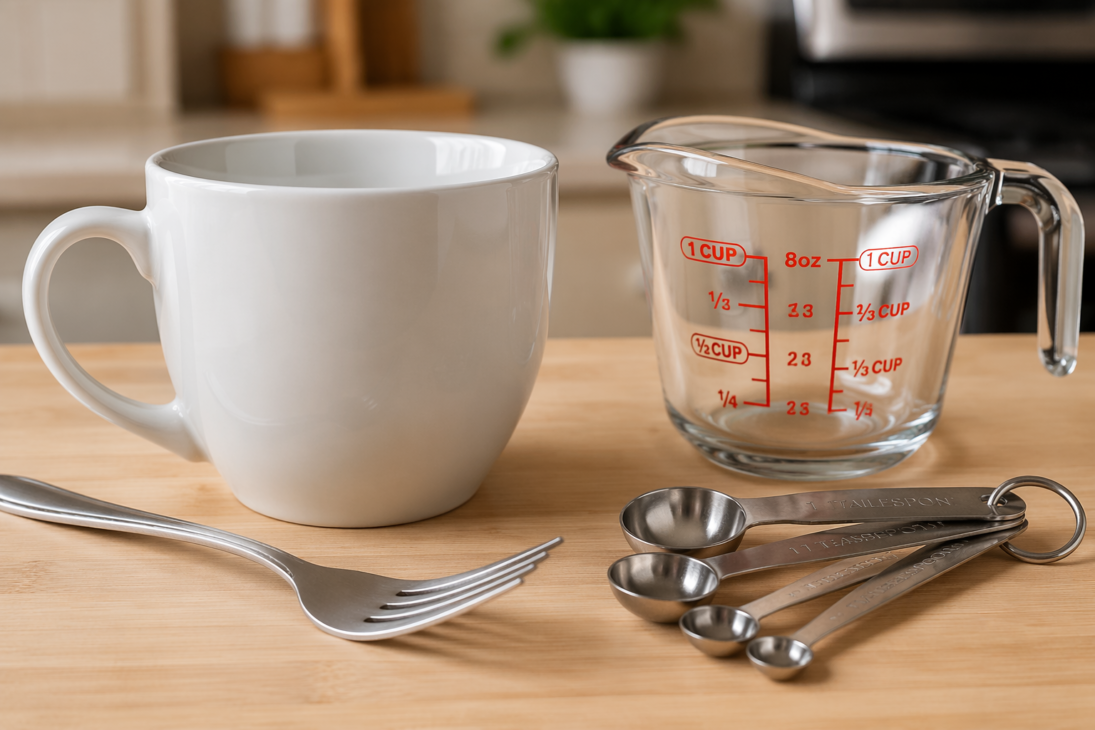
| Microwave-safe mug or ramekin (6+ inches wide) | Cooking vessel that prevents overflow | Glass, ceramic, or microwave-safe plastic work; avoid metal |
| Fork or small whisk | Combining and blending ingredients thoroughly | Ensures no lumps and even mixing of wet ingredients |
| Measuring spoons | Accurate ingredient portions for consistent results | Critical for baking powder and vanilla extract amounts |
| Measuring cup | Portioning milk and oil precisely | 1/4 cup or smaller works best for this recipe |
| Peanut butter (creamy) | Base ingredient for flavor and structure | Natural or salted varieties work; avoid chunky for smoothness |
| All-purpose flour | Provides structure and crumb to the cake | Can substitute with gluten-free blend or oat flour |
| Baking powder | Helps the cake rise and become fluffy | Tiny amount—about 1/8 teaspoon—is essential |
| Milk (dairy or non-dairy) | Adds moisture and blends dry ingredients | Almond milk, oat milk, or regular dairy milk all work |
| Oil or melted butter | Adds richness and keeps the cake tender | Vegetable, coconut, or olive oil are fine |
| Sugar (white or brown) | Sweetens the cake and aids in moisture | Brown sugar adds depth; white keeps it lighter |
| Egg or egg yolk | Binds ingredients and creates fudgy texture | Egg yolk alone makes it extra rich; whole egg is standard |
| Vanilla extract | Amplifies peanut butter flavor (optional but recommended) | Use pure vanilla for best results |
| Chocolate chips (optional) | Adds texture and chocolatey sweetness | Dairy-free chocolate chips for vegan versions |
Step 1: Gather and Measure Your Ingredients
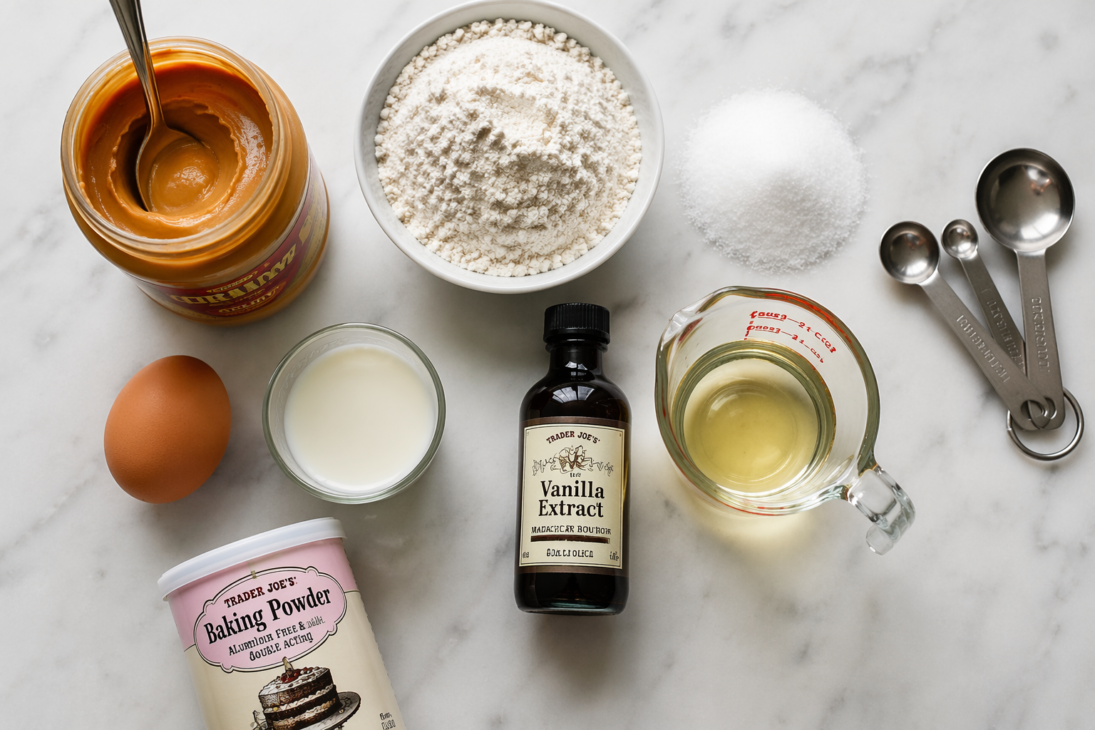
Before you start mixing, have everything within arm’s reach. Grab a microwave-safe mug or ramekin—ideally at least 6 inches wide—because peanut butter batter expands when it cooks. Measure out 3 tablespoons of creamy peanut butter, 1/4 cup of milk, 1 egg, 1/4 cup of sugar, 2 tablespoons of all-purpose flour, 1/4 teaspoon of baking powder, a pinch of salt, 1/8 teaspoon of vanilla extract, and 1 tablespoon of oil or melted butter. Having everything ready prevents scrambling mid-mix and ensures even distribution.
Step 2: Combine Wet Ingredients and Sugar in Your Mug
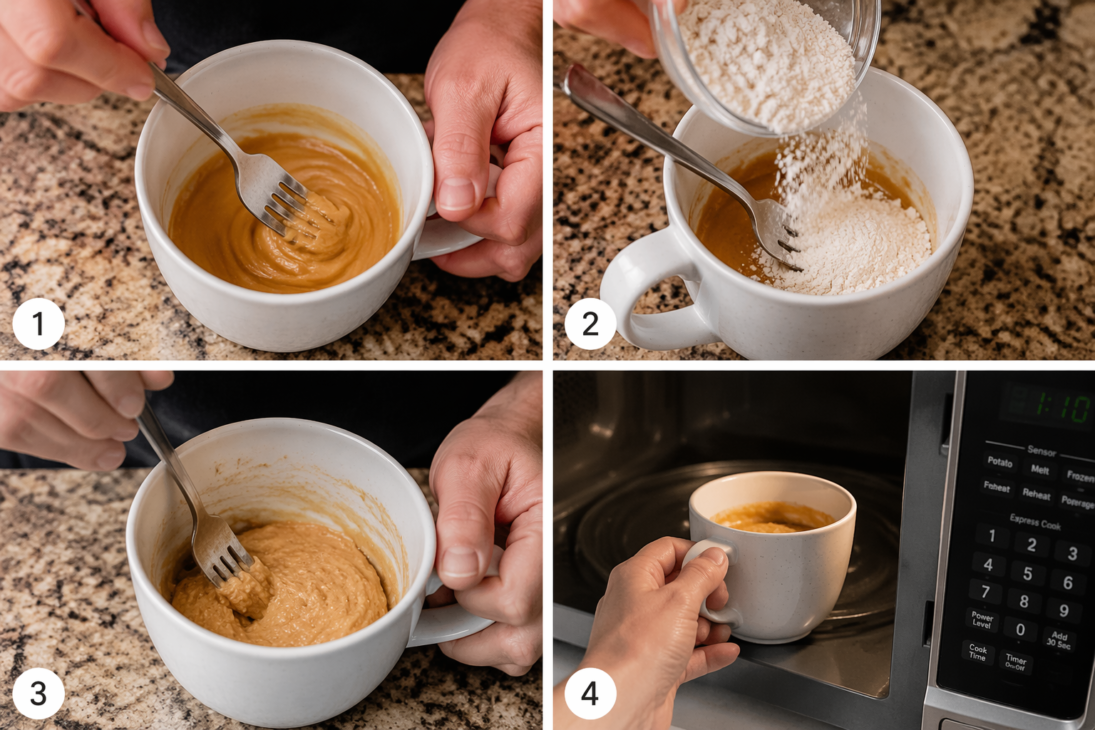
Start by adding the peanut butter, egg, vanilla, milk, and oil directly into your mug. Add the sugar too. Using a fork, whisk everything together thoroughly until the mixture is completely smooth and uniform in color. This step is crucial—any lumps of peanut butter will create an uneven crumb. Keep whisking for about 30 seconds until you see no streaks of peanut butter remaining. A classic microwave cake recipe follows this same wet-first method to avoid overmixing dry ingredients.
Step 3: Add and Fold in Dry Ingredients Gently
Sprinkle the flour and baking powder over the wet mixture. Using your fork, gently stir just until the dry ingredients are incorporated—aim for about 8 to 10 stirs, no more. This is where most people stumble. Overmixing develops gluten and creates a dense, rubbery texture instead of that tender, fudgy crumb. Stop as soon as you see no white streaks of flour. A few small lumps are actually okay at this point.
Step 4: Optional—Fold in Chocolate Chips
If you want chocolate in every bite, stir in 1 tablespoon of chocolate chips or chunks right now. They’ll melt slightly as the cake cooks, creating pockets of fudgy richness. Some people prefer to add them after cooking instead, keeping them firm on top. Either way works—it’s purely preference.
Step 5: Microwave for 60 Seconds to 2 Minutes
Place your mug in the microwave and cook on high. Start with 60 seconds. After that first minute, carefully open the door and poke the top of the cake with a fork or toothpick. If it springs back immediately and looks set, you’re done. If the center still looks wet or jiggles, give it another 15 to 30 seconds. Every microwave runs differently—some are more powerful—so checking early prevents drying it out. The goal is a soft, slightly jiggly center that sets as it cools.
Step 6: Cool Briefly and Enjoy Straight from the Mug
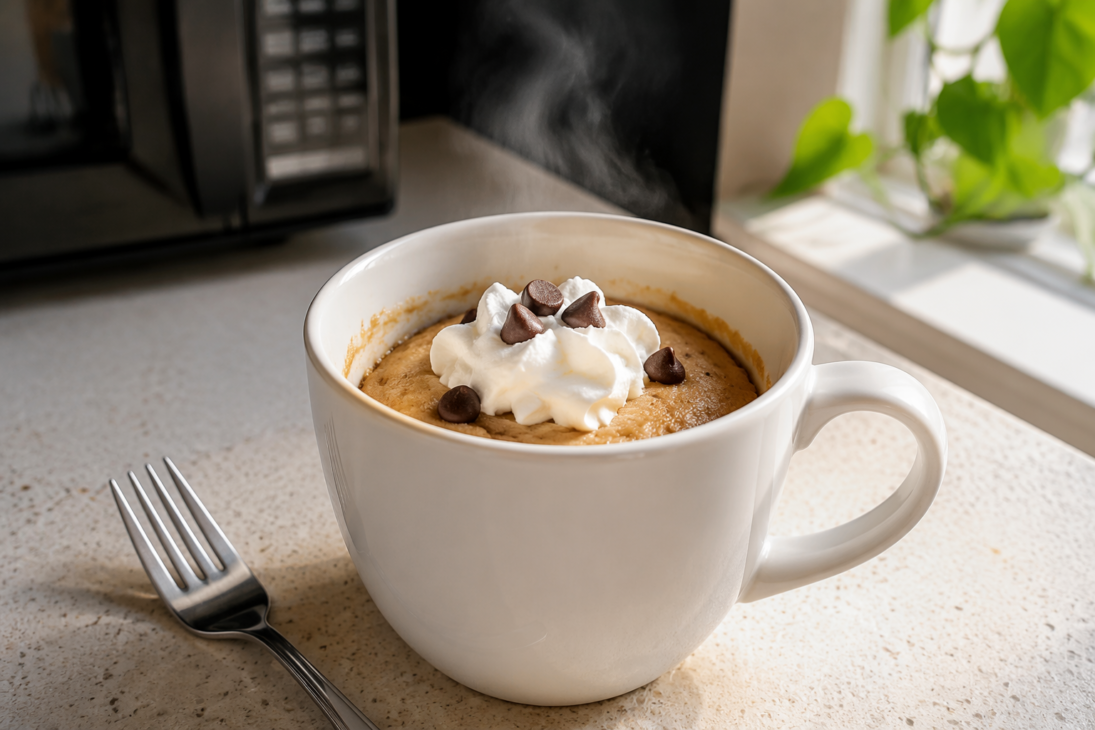
Let your mug cake sit for about 30 to 60 seconds before eating. It’ll firm up slightly and be easier to enjoy without burning your mouth. You can eat it straight from the mug with a spoon, or slide it onto a small plate. The cake will be warm, fudgy, and soft—exactly what you want. If you’re adding toppings like whipped cream or ice cream, do it now while the cake is still warm.
Tips for Success Every Time
Timing is everything. Peanut butter cakes are done the moment the top springs back when touched—not when they look bone-dry. Err on the side of undercooking by 10 seconds rather than overcooking; they continue cooking slightly after you remove them.
Use creamy peanut butter for a smooth batter. Chunky varieties create lumps and uneven texture, and natural peanut butter with separated oil can throw off your ratios. Standard creamy peanut butter is the safest choice.
Mug size matters more than you’d think. A mug under 6 inches wide will cause batter to overflow messily. A ramekin, cereal bowl, or mug slightly larger than standard ensures the cake rises without spilling onto your microwave floor.
Cold eggs straight from the fridge can slightly throw off the final texture. Room-temperature eggs blend more smoothly with the peanut butter and create a more uniform crumb.
Salt enhances peanut butter flavor dramatically. Even if your peanut butter is salted, add a pinch of regular salt to the batter—it deepens the taste without making it salty.
Vanilla extract is worth using even though it seems optional. It doesn’t add a vanilla taste; instead, it amplifies the peanut butter flavor and prevents the cake from tasting flat or one-dimensional.
Brown sugar creates a deeper, more caramel-like sweetness compared to white sugar. Mix them 50-50 if you want complexity without sacrificing tenderness.
Common Mistakes to Avoid
Overmixing the batter creates a dense, rubbery texture that nobody wants. Mix wet ingredients first, then fold dry ingredients in gently—stop as soon as flour disappears. This takes discipline, but it’s the difference between a tender cake and a hockey puck.
Using a mug that’s too small leads to overflow. The batter rises significantly in the microwave, so a standard coffee mug will bubble over. Always use at least a 6-inch-wide vessel.
Skipping baking powder entirely won’t work if you want a fluffy, risen cake. Even 1/8 teaspoon makes a difference. If you want a denser, fudgy cake, 3-ingredient versions (peanut butter, sugar, egg) skip it intentionally and produce a different texture.
Forgetting to whisk the wet ingredients smooth before adding flour means lumps of peanut butter end up in the final cake. Spend 30 seconds getting it smooth—it’s worth it.
Using oil instead of butter (or vice versa) won’t ruin anything, but oil creates a slightly more tender cake while melted butter adds richness. Choose based on what you have on hand.
Troubleshooting Your Mug Cake
If the cake is too dry, your microwave runs hot or you cooked too long. Next time, reduce cooking time by 15 seconds and check at the 45-second mark instead. Dryness is permanent once the cake is cooked, so it’s better to check early and add a few more seconds if needed.
If the center is still liquid after 2 minutes, microwave for another 15 to 20 seconds. Thick batters (heavy on peanut butter) take slightly longer than thinner ones. Check again and repeat in short intervals rather than adding time all at once.
If the flavor tastes bland or one-dimensional, you likely need more salt or vanilla. Add a tiny pinch of salt next time, or swap in a higher-quality vanilla extract. Peanut butter flavor can get muted in the microwave without these enhancers.
If the cake doesn’t rise at all, baking powder might be old or you forgot to add it. Baking powder loses potency over time—replace it if it’s been sitting open for over a year.
If the top is fluffy but the center is dense, you overmixed the dry ingredients. The next time, count your stirs and aim for no more than 10 total mixes before the flour vanishes.
My Experience With Peanut Butter Mug Cake Recipe
I’ve made dozens of these over the years, mostly on nights when I didn’t plan dessert until 8 PM. The first time I nailed it—perfectly fudgy, not dry—I realized the fork-and-mug approach works because you’re physically controlling every step. No electric mixer means no accidental overmixing. The real win is the timing check at 60 seconds. That one pause separates a moist cake from a rubbery disappointment. I’ve also found that brown sugar makes a noticeable difference in depth, and adding salt changes everything—it’s the secret move that makes people wonder if you used actual peanut butter. The biggest mistake I see people make? Impatience. They keep microwaving in long stretches instead of checking at 60 seconds and adding 15-second bursts. My microwave runs strong, so I always start with 50 seconds and work up from there. What’s your microwave power like—do you find yourself cooking longer or shorter than the standard minute?
FAQ
Q: Are there healthy peanut butter mug cake options?
Healthy options include vegan recipes using almond milk, maple syrup, and dairy-free chocolate chunks instead of refined sugar and butter. You can also swap all-purpose flour for gluten-free flour and use unsweetened peanut butter to reduce added sugars while keeping the cake moist and delicious.
Q: How long does it take to make a peanut butter mug cake?
A peanut butter mug cake takes about 5 minutes total, with 2 minutes of prep and 1 to 2 minutes of cooking time. Most recipes require microwaving for 45 to 90 seconds, depending on your microwave’s power, and the cake is ready once it rises and springs back when touched.
Q: Does peanut butter mug cake need baking powder?
Most peanut butter mug cake recipes include baking powder to help the cake rise and become fluffy in the microwave. However, some 3-ingredient flourless versions skip baking powder entirely, relying on the egg and peanut butter to create a dense, fudgy texture without needing additional leavening agents.
Q: Will peanut butter mug cake work in the oven?
Yes, you can bake peanut butter mug cake in the oven by heating it to 375°F and placing the batter in an oven-safe ramekin or mug. Bake for 15 to 20 minutes until the cake is domed and the top springs back when poked, similar to the microwave method but with a slower, more even cook.
Q: When should I add chocolate chips to mug cake?
Add chocolate chips after mixing the wet and dry ingredients, stirring them in just before microwaving. This ensures the chips melt slightly into the fudgy cake without burning. You can also top the cooked cake with extra chips or a drizzle of peanut butter for added flavor and texture.
Q: What is the best peanut butter for mug cake?
Creamy peanut butter is the best choice for mug cake because it blends smoothly into the batter without lumps. Unsweetened or natural peanut butter works well too, but avoid chunky varieties as they can create uneven texture. Salted peanut butter adds a nice flavor balance to the sweet cake.
Q: Which toppings go best with peanut butter mug cake?
Top your peanut butter mug cake with mini chocolate chips, peanut butter chips, Reese’s Pieces, or a drizzle of extra peanut butter. Ice cream, whipped cream, or a sprinkle of sea salt also enhance the flavor, making the moist, fudgy dessert even more delicious and customizable for any taste.
Recipe Card
Peanut Butter Mug Cake
A soft, fudgy single-serve peanut butter cake made in the microwave in under 3 minutes using simple pantry ingredients.
Prep: 2 minutesCook: 1-2 minutesTotal: 3-4 minutesYield: 1 servingCategory: DessertCuisine: American
Ingredients
- 3 tablespoons creamy peanut butter
- 1 egg (or egg yolk)
- 1/4 cup sugar (white or brown)
- 1/4 cup milk (dairy or non-dairy)
- 2 tablespoons all-purpose flour
- 1/4 teaspoon baking powder
- 1 tablespoon vegetable oil or melted butter
- 1/8 teaspoon vanilla extract
- Pinch of salt
- 1 tablespoon chocolate chips (optional)
Instructions
- Add peanut butter, egg, vanilla, milk, oil, and sugar to a microwave-safe mug (at least 6 inches wide). Whisk with a fork until completely smooth and uniform.
- Sprinkle flour and baking powder over the wet mixture. Gently fold in with your fork, stirring only until dry ingredients disappear (about 8-10 stirs). Do not overmix.
- Stir in chocolate chips if desired.
- Microwave on high for 60 seconds. Check the top by poking it with a fork—if it springs back, it’s done. If still wet in the center, microwave for another 15-30 seconds.
- Let cool for 30-60 seconds, then eat straight from the mug with a spoon or slide onto a plate.
- Top with whipped cream, extra chocolate chips, or vanilla ice cream if desired.
Nutrition Info (per serving)
| Calories | 340 |
| Protein | 10g |
| Carbs | 38g |
| Fat | 16g |
| Fiber | 2g |
| Sugar | 24g |
| Sodium | 280mg |
Notes
- Every microwave runs differently; start checking at 60 seconds to avoid overcooking.
- Use a mug or ramekin at least 6 inches wide to prevent overflow.
- Cold eggs work, but room-temperature eggs blend more smoothly.
- Brown sugar creates a deeper flavor; white sugar keeps it lighter.
- For a 3-ingredient flourless version, use only peanut butter, sugar, and egg—skip flour and baking powder.
Latest Updates: 2026 Microwave Dessert Trends
The microwave dessert category continues growing as people seek ultra-fast homemade treats. In 2026, single-serve mug cakes remain popular for portion control and minimal cleanup. Newer variations focus on plant-based alternatives—oat milk and aquafaba (chickpea liquid) replace traditional dairy and eggs in many vegan versions. Keto adaptations using erythritol or monk fruit sweetener have also gained traction. Air fryer mug cakes are emerging as an alternative to microwaving, though microwave versions remain fastest. Healthier spin-offs featuring almond butter, sunflower seed butter, and tahini are challenging the peanut butter dominance. Gluten-free and allergen-friendly recipes continue expanding as more people manage dietary restrictions. The trend toward customizable toppings and mix-ins—from crushed pretzels to swirls of Nutella—shows that peanut butter mug cakes are no longer just a quick fix, but a legitimate dessert platform worth experimenting with.
Conclusion
Peanut butter mug cake is proof that great desserts don’t require a full kitchen, precise timing, or an oven. You need one mug, seven basic ingredients, and less than 3 minutes. The technique is simple: whisk wet ingredients smooth, fold dry ingredients gently, and microwave until the top springs back. What separates a good mug cake from a great one is respecting the timing—check at 60 seconds, and add time in 15-second bursts rather than guessing. Use creamy peanut butter, don’t skip the salt, and resist the urge to overmix. Whether you’re a beginner looking for an easy dessert or someone who wants a midnight treat without heating the house, this recipe delivers every time. The best part? You can customize it endlessly. Brown sugar for depth, chocolate chips for richness, or a drizzle of peanut butter on top—each version feels like a new discovery. Master the basic technique first, then play.
References
- Tastes Better From Scratch. (n.d.). Peanut Butter Mug Cake. https://tastesbetterfromscratch.com/peanut-butter-mug-cake/
- Just So Tasty. (n.d.). Peanut Butter Mug Cake. https://www.justsotasty.com/peanut-butter-mug-cake/
- Kitchen Treat. (n.d.). Easy Vegan Peanut Butter Mug Cake. https://www.kitchentreaty.com/easy-vegan-peanut-butter-mug-cake/
- Oh Sweet Basil. (n.d.). 5-Minute Peanut Butter Mug Cake Recipe. https://ohsweetbasil.com/peanut-butter-mug-cake-recipe/
- The Big Man’s World. (n.d.). 3-Ingredient Peanut Butter Mug Cake. https://thebigmansworld.com/keto-peanut-butter-mug-cake/
- Olives + Thyme. (n.d.). Peanut Butter Mug Cake (Quick and Easy Recipe). https://olivesnthyme.com/peanut-butter-mug-cake/
- Healthy Recipes Blogs. (n.d.). This Single-Mug Dessert Turns Peanut Butter into Cake in 60 Seconds. https://healthyrecipesblogs.com/peanut-butter-mug-cake/
- Listotic. (n.d.). Easy Microwave Peanut Butter Mug Cake Recipe (3 Ingredients). https://listotic.com/easy-3-ingredient-microwave-peanut-butter-mug-cake-recipe/
