

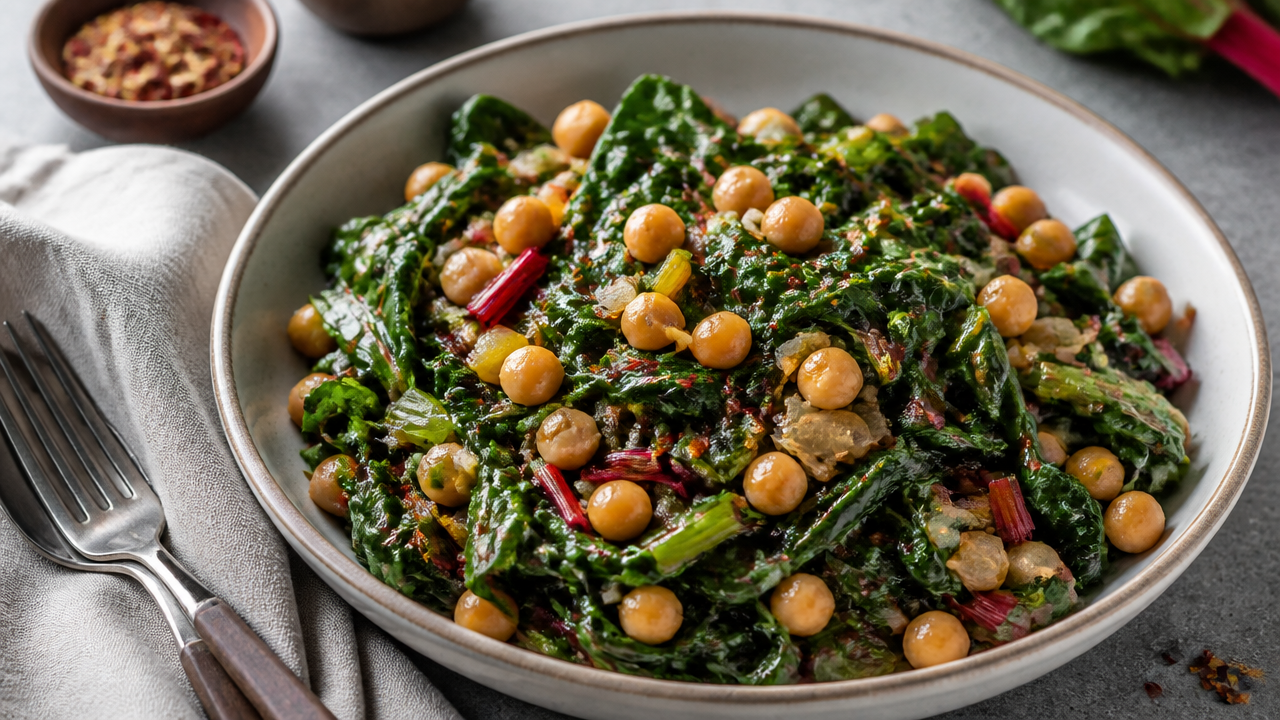
What makes a truly great sauteed Swiss chard and chickpeas recipe stand out from every other version you’ve tried? The answer lies in timing, separation, and one critical detail most home cooks miss: how you handle the stems versus the leaves. Whether you’re planning a weeknight dinner or a summer cookout, this sauteed Swiss chard with chickpeas recipe delivers tender, garlicky greens with crispy legumes in under 20 minutes. The combination works as a standalone vegetarian main, a hearty side dish, or even a topping for grain bowls and soups. This guide walks you through every step, from prep to plate.
Quick Questions and Answers
Question: Why should you separate Swiss chard stems from leaves? Separating stems from leaves ensures even cooking because stems are thicker and need more time to soften. Chopping stems into small pieces and tearing leaves allows the stems to cook first, then the leaves are added so they wilt perfectly without becoming mushy. This technique prevents the dish from being undercooked or overcooked.
Question: Can you use canned chickpeas for sauteed Swiss chard? Yes, canned chickpeas work perfectly and save significant prep time. You should drain and rinse them thoroughly before adding them to the skillet. Many recipes recommend drying them between paper towels first to help them get crispy when sauteed with garlic and oil.
Question: How long does Swiss chard take to become tender? Swiss chard typically takes about 10 minutes to become fully tender when covered and steamed with broth. If you only wilt the leaves first, they cook in 3 to 4 minutes, but the stems need extra time. Covering the skillet speeds up the process and ensures the greens are soft.
What You Need
| Item | Purpose | Notes |
|---|---|---|
| Large bunch Swiss chard | Base vegetable | Choose bright, crisp leaves without wilting or dark spots |
| 15 oz canned chickpeas | Protein and texture | Drain, rinse, and pat dry for crispiness |
| Olive oil or ghee | Cooking fat | 2–3 tablespoons total; quality matters for flavor |
| Fresh garlic cloves | Aromatics and flavor | 3–4 cloves, thinly sliced or minced |
| Shallot or onion | Aromatics and sweetness | 1 medium, finely diced |
| Red pepper flakes | Optional heat | 1/4 teaspoon or to taste |
| Lemon juice or vinegar | Acid for brightness | Finish at the end to prevent bitterness |
| Large skillet or Dutch oven | Cooking vessel | Heavy-bottomed works best for even heat |
| Chef’s knife and cutting board | Prep tools | Sharp knife makes chard prep faster and safer |
Get Ready: Ingredients and Tools
Stack your chard leaves on the cutting board and roll them tightly into a log shape. Slice across the roll to create ribbons—this technique, called chiffonade, keeps the leaves tender and allows them to cook evenly. Chop the stems separately into 1/4-inch pieces; they’ll go into the pan first since they need more time than the delicate leaves.
Make sure your canned chickpeas are thoroughly drained and rinsed under cool water. The starchy coating they come in can prevent browning, so this step is non-negotiable. Pat them dry between paper towels—moisture is the enemy of crispy chickpeas. If you’re using fresh chickpeas, ensure they’re cooked through and completely dry before sautéing.
Mince or thinly slice your garlic and finely dice your shallot or onion. Having everything prepped before you start cooking is essential; once the pan heats up, things happen fast, and you won’t have time to chop mid-sauté.
Prep Work and Sequencing
The order of operations here is everything. Many cooks throw all the chard into the pan at once and end up with a mushy, unevenly cooked mess. The solution is the stem-and-leaf split: stems go in first, leaves follow. This staggered approach ensures every part reaches that sweet spot of tenderness.
Start by separating your chard stems from the leaves. If you’re working with a large bunch, this might take a few minutes, but it’s worth every second. The stems—those thick, celery-like parts—contain more fiber and dense cellular structure than the leaves. They need 3 to 4 minutes of cooking time to soften completely. The leaves, by contrast, wilt in about 2 to 3 minutes if the pan is hot enough.
Pat your chickpeas dry between clean paper towels and set them aside. Dry chickpeas sauté to golden crispness; wet ones steam and stay soft. The difference between a crispy, textured bite and a mushy legume comes down to this single prep step.
Step 1: Heat Your Oil Until It Shimmers

Pour 2 to 3 tablespoons of olive oil or ghee into your large skillet and set the heat to medium. You’re aiming for the oil to shimmer—that means it’s hot enough to cook but not so hot that it smokes. A shimmering surface is your visual cue that the pan is ready. This usually takes 2 to 3 minutes.
Why medium and not high? High heat can burn your aromatics before they soften, and burnt garlic tastes metallic and bitter. Medium heat gives you control and allows flavors to develop gently.
Step 2: Sauté the Chickpeas Until Golden and Crispy

Once the oil shimmers, add your dried chickpeas to the pan. Spread them in a single layer if possible—crowding the pan forces them to steam rather than sauté. Let them cook undisturbed for about 2 minutes, then stir and cook for another 2 to 3 minutes until the exterior is golden brown and slightly crispy.
You’re not trying to cook them through—they’re already cooked from the can. You’re building a crust on the outside and toasting the starches for crunch and deeper flavor. If your chickpeas look pale after 4 minutes, raise the heat slightly and give them another minute.
Step 3: Add the Chard Stems and Cook Until Softening Begins

Once the chickpeas are golden, lower the heat to medium-low and add your chopped chard stems. Stir them into the oil and chickpeas for about 1 minute to coat them evenly. Then let them cook undisturbed for 2 to 3 minutes. They should start to look translucent at the edges and soften slightly.
This is the crucial moment: the stems are tender enough now to accept the leaves without creating a two-speed cook situation. If you add the leaves now, they’ll wilt in the residual heat while the stems finish softening.
Step 4: Add Garlic, Shallots, and Aromatics—Watch Carefully

Add your minced or sliced garlic, diced shallot, and red pepper flakes (if using) to the pan. Stir constantly for about 2 minutes. You want the garlic and shallot to turn golden and fragrant, not brown or burnt. This is where many cooks slip up—they walk away for a second and the garlic goes from golden to charred.
According to Foodie Crush, sautéing garlic and shallots until softened without browning them is essential because burnt aromatics become bitter instead of sweet, ruining the entire dish. Keep your eyes on the pan and your nose alert for that warm, garlicky aroma—that’s your cue that they’re done.
Step 5: Add the Chard Leaves in Batches and Cook Until Wilted
Now comes the leaves. If your bunch of chard is large, add it in two batches so the pan isn’t completely crowded. Stir the first batch into the oil and aromatics for about 1 minute, allowing it to wilt slightly, then add the second batch. Stir everything together.
Pour in a splash of broth or water—about 1/4 cup—and cover the skillet with a lid. This traps steam and allows the leaves to wilt without overcooking. Cook for about 3 to 4 minutes until the leaves are soft and most of the liquid has evaporated. If you’re cooking without a lid, stir occasionally and cook until the leaves are tender, about 5 to 6 minutes total.
The key here is watching for the moment when the leaves turn dark green and become tender but not mushy. Once you’ve removed the excess liquid and the greens are soft, you’re nearly done.
Step 6: Finish With Acid and Adjust Seasoning
Remove the pan from heat and squeeze fresh lemon juice over the top, or add a splash of vinegar or Worcestershire sauce. This final acid step is non-negotiable—it brightens the earthy, slightly bitter notes in the chard and makes the entire dish sing. As The Kitchn explains in their Swiss chard with garbanzo beans recipe, finishing with bright flavors transforms the flavor profile.
Taste and adjust salt and pepper to your preference. The chickpeas and oil should already have brought some savory depth, but a pinch more salt often brings out all the flavors.
Tips for Success
Timing is everything. If your chard still tastes bitter after cooking, it usually means the leaves went too long without heat or the garlic was burnt. Add a drizzle more oil and squeeze of lemon to rescue the dish.
Don’t skip the drying step for canned chickpeas. Moisture is the single biggest obstacle to getting that crispy texture. Pat them dry, let them sit exposed to air for a minute, then pat again if needed.
If your pan is too crowded, the greens will steam instead of sauté. A crowded pan traps moisture, and moisture equals limp, mushy chard. Work in batches if you need to—it takes an extra minute and makes all the difference.
The stems are done when they’re translucent at the edges and tender but still hold a slight resistance when you bite them. Overcooked stems turn to mush; undercooked stems stay woody and unpleasant.
Common Mistakes to Avoid
Adding leaves before the stems results in uneven cooking where some parts are mushy and others remain fibrous and tough. Always give the stems a 2 to 3 minute head start.
Burning the garlic is the second most common misstep. Brown or burnt garlic turns bitter and metallic, overpowering the delicate chard and chickpeas. Keep your heat at medium and stir constantly during the aromatic stage.
Overcrowding the pan forces the chard to steam rather than sauté. Steamed chard lacks the slight caramelization that makes this dish memorable. If your bunch is large, split it into two batches and add them sequentially.
Adding acid too early washes out the chard’s color and dulls its flavor. Always finish with lemon or vinegar at the very end, off the heat.
Troubleshooting Your Sauté
If the chard tastes too bitter, try adding an extra drizzle of olive oil or a squeeze of fresh lemon juice at the end. Bitterness in chard often indicates either overcooking or burnt aromatics—next time, watch the garlic more carefully and reduce cooking time by 1 to 2 minutes.
If the dish is watery, continue cooking over medium heat until the liquid reduces to almost nothing. Alternatively, use a slotted spoon to remove the greens and chickpeas into a serving dish, leaving excess liquid behind in the pan. Some moisture is normal and helps carry flavors, but a soupy result means more cooking time is needed.
If the chickpeas aren’t crispy, increase the heat slightly during step 2 and ensure the pan isn’t too crowded. Chickpeas need direct contact with the hot pan surface to develop a crust. If the pan is packed full, they’ll crowd each other and steam instead of sauté.
If the chard stems still feel tough after step 5, cover the pan and cook for another 1 to 2 minutes. Very thick stems need extra time. You can also add a splash more broth and cover again—the steam will soften them without making the leaves mushy.
My Experience With The Perfect Sauteed Swiss Chard With Chickpeas Recipe
I’ve made this dish probably fifty times now, and I still get it wrong occasionally. The first time, I burned the garlic because I stepped away to answer the phone—five seconds, maybe. The entire pan tasted metallic and bitter, a total loss. Now I stay planted at the stove during the aromatic stage and set a timer if I’m worried I’ll forget.
The stem-and-leaf separation was a revelation when I finally understood why it matters. Before, I just threw everything in at once and ended up with chard that tasted overcooked and stringy. Once I started cooking the stems first, the entire texture shifted. The stems became tender without falling apart, and the leaves wilted perfectly without turning to mush.
The crispy chickpeas were the second game-changer. I used to just add them straight from the can, rinsed but not dried. They stayed soft and pale, barely noticeable in the dish. The moment I started patting them dry and sautéing them first, they became a real textural element—crispy on the outside, creamy inside. That contrast against the soft chard is what makes this recipe sing.
My only real mishap now is overcrowding the pan. I always think I can fit the whole bunch of chard at once, and every time I’m wrong. Steam rises, moisture traps, and the greens come out limp. When I finally split the chard into two batches, everything changed. Do you struggle with any particular step, or is there a variation you’ve added that works for you?
FAQ
Q: Are Swiss chard and kale the same vegetable?
No, Swiss chard and kale are different vegetables with distinct textures and flavors. Swiss chard has large, crinkly leaves and thick, celery-like stems that are tender when cooked. Kale has tougher, darker leaves and a more robust, sometimes bitter flavor that requires longer cooking times. If you substitute kale for chard in this recipe, add 2 to 3 extra minutes of cooking time and expect a more assertive, earthy taste.
Q: How do you make chickpeas crispy in a chard recipe?
To make chickpeas crispy, dry them well after rinsing and sauté them in hot oil over medium-high heat until golden. Cook them for 3 to 4 minutes while stirring frequently before adding other ingredients. This step creates a nice texture contrast against the soft, wilted chard leaves. Avoid crowding the pan, as moisture prevents browning.
Q: What oil works best for sautéing Swiss chard and chickpeas?
Olive oil is the most common and recommended oil for this dish, adding a rich flavor that complements the greens. Some recipes suggest using sun-dried tomato oil if available, but regular olive oil works perfectly. You typically need about 2 to 3 tablespoons total for the entire cooking process, depending on your pan size and how much chard you’re cooking.
Q: Does Swiss chard have a bitter taste like spinach?
Swiss chard has a mild, slightly earthy flavor that is less bitter than spinach but can have a subtle bitterness if not cooked properly. Adding lemon juice, garlic, or vinegar helps balance any potential bitterness. Cooking the stems until tender also reduces any harsh flavors and brings out the chard’s natural sweetness.
Q: When should you add lemon juice to Swiss chard?
Lemon juice is usually added at the end of cooking, just before serving, to preserve its bright, fresh flavor. Adding it too early can cause the chard to lose its vibrant green color and make the dish taste dull. Drizzling it over the hot mixture immediately before plating is ideal for maximum brightness.
Q: Which cheese pairs well with garlicky Swiss chard?
Feta cheese is the most popular pairing, sprinkled on top just before serving for a salty, tangy contrast. Aged goat cheese or Parmesan also work well as alternatives. The cheese adds a creamy texture and rich flavor that complements the garlicky, earthy chard and chickpeas. For a creamier finish, dollop Greek yogurt on top instead.
Q: What is the best way to store cooked Swiss chard?
Store cooked Swiss chard in a sealed container in the refrigerator for up to 3 to 4 days. It can be reheated gently in a skillet or oven to maintain texture. Avoid freezing it if possible, as the greens may become mushy and lose their structure when reheated. Reheat on the stovetop over medium-low heat rather than in the microwave for best results.
Recipe Card
The Perfect Sauteed Swiss Chard With Chickpeas
A tender, garlicky side dish with crispy chickpeas, perfectly wilted Swiss chard, and bright lemon finish. Takes under 20 minutes from start to plate.
Prep: 10 minutesCook: 15 minutesTotal: 25 minutesYield: 4 servingsCategory: Side DishCuisine: Mediterranean
Ingredients
- 1 large bunch fresh Swiss chard, stems and leaves separated and chopped
- 1 can (15 oz) chickpeas, drained, rinsed, and patted dry
- 2.5 tablespoons olive oil or ghee
- 3-4 cloves fresh garlic, thinly sliced or minced
- 1 medium shallot or small onion, finely diced
- 1/4 teaspoon red pepper flakes (optional)
- 1/4 cup vegetable or chicken broth
- Juice of 1/2 lemon or 1 tablespoon vinegar
- Salt and black pepper to taste
Instructions
- Pat the drained chickpeas dry between clean paper towels.
- Heat 2.5 tablespoons olive oil in a large skillet over medium heat until shimmering.
- Add chickpeas to the hot oil and sauté for 4-5 minutes, stirring occasionally, until golden and crispy.
- Lower heat to medium-low and add chopped chard stems. Cook for 2-3 minutes until they begin to soften.
- Add minced garlic, diced shallot, and red pepper flakes (if using). Stir constantly for 2 minutes until fragrant and golden.
- Add chard leaves in batches if needed and stir for 1 minute. Pour in broth, cover, and cook for 3-4 minutes until leaves are tender and liquid mostly evaporates.
- Remove from heat and squeeze fresh lemon juice over the top. Taste and adjust salt and pepper.
- Serve immediately, optionally topped with feta cheese or a dollop of Greek yogurt.
Nutrition Info (per serving)
| Calories | 240 |
| Protein | 10g |
| Carbs | 22g |
| Fat | 14g |
| Fiber | 4g |
| Sugar | 2g |
| Sodium | 340mg |
Notes
- Don’t skip drying the chickpeas; moisture prevents crispiness.
- Keep the heat on medium during the garlic stage to avoid burning the aromatics.
- If the chard tastes too bitter, add extra lemon juice or a drizzle more olive oil at the end.
- This dish stores well in the refrigerator for 3-4 days and reheats gently on the stovetop.
References
- The Kitchn. (n.d.). Sautéed Swiss chard recipe (with chickpeas). The Kitchn. https://www.thekitchn.com/recipe-swiss-chard-with-garbanzo-beans-249801
- Foodie Crush. (n.d.). Garlicky Swiss chard and chickpeas. Foodie Crush. https://www.foodiecrush.com/garlicky-swiss-chard-and-chickpeas/
- Dishing Up The Dirt. (n.d.). Garlicky Swiss chard & chickpea stir fry. Dishing Up The Dirt. https://www.dishingupthedirt.com/recipes/garlicky-swiss-chard-chickpea-stir-fry/
- Cup of Jo. (2024, February 14). Chickpea and Swiss chard stew. Cup of Jo. https://cupofjo.com/2024/02/14/chickpea-and-swiss-chard-stew/
- Food52. (n.d.). Savory Swiss chard with chickpeas. Food52. https://food52.com/recipes/14177-savory-swiss-chard-with-chickpeas
- Cooks Without Borders. (n.d.). Ottolenghi’s chickpeas and Swiss chard with yogurt. Cooks Without Borders. https://cookswithoutborders.com/ottolenghis-chickpeas-and-swiss-chard-with-yogurt
- Making Thyme for Health. (n.d.). One-pot garlicky chard with chickpeas. Making Thyme for Health. https://www.makingthymeforhealth.com/one-pot-garlicky-chard-with-chickpeas/
