
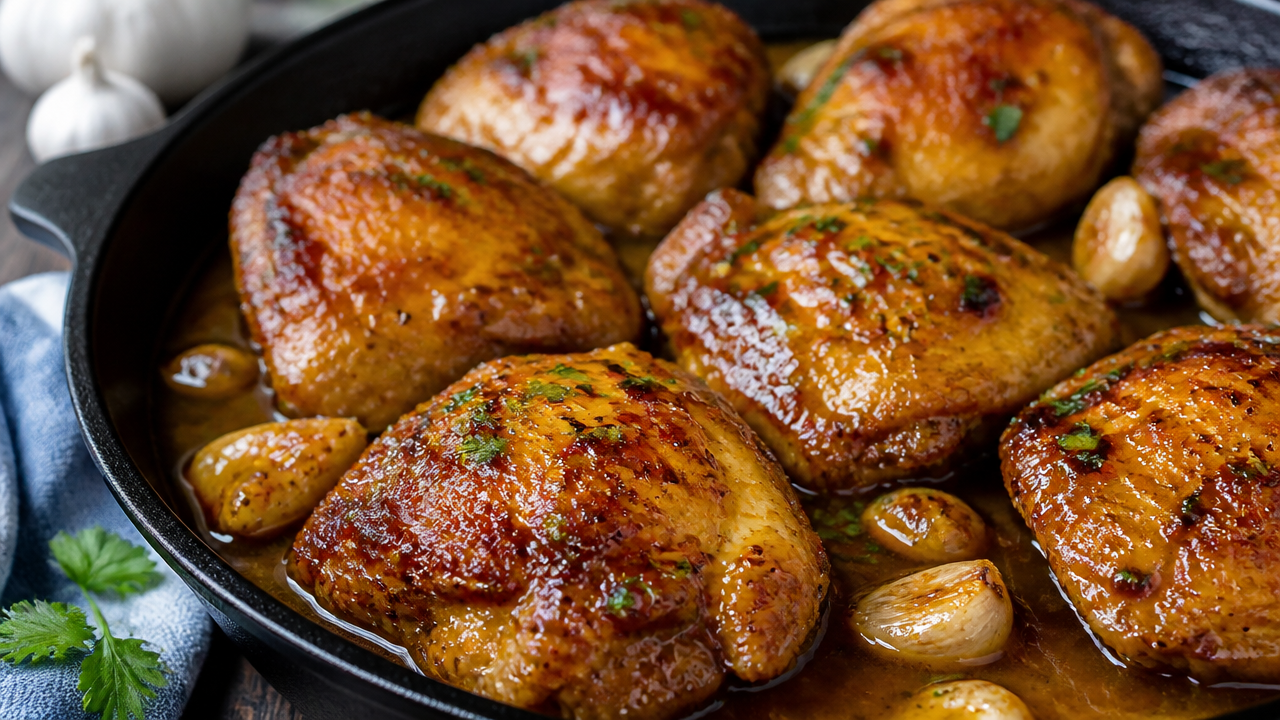
Wondering what makes the difference between rubbery chicken thighs and ones that emerge golden, crispy-skinned, and glazed in a sticky honey-garlic sauce? The answer lies in technique: searing the thighs properly, cooking the sauce separately to prevent soggy skin, and finishing with just enough heat to caramelize without burning. This recipe works equally well for weeknight dinners or holiday gatherings, and once you understand the core steps, you can adapt it endlessly. Whether you’re planning a summer cookout or a cozy winter dinner, honey garlic butter chicken thighs deliver restaurant-quality results at home with minimal fuss.
Quick Questions and Answers
Question: Why do honey garlic butter chicken thighs need cornstarch? Cornstarch creates a crispy coating when the chicken is fried or baked, giving the thighs a crunchy exterior that holds up against the sticky sauce. It helps the honey garlic butter sauce adhere better to the meat without making it soggy. Most recipes coat the chicken in cornstarch before frying to achieve this golden, crisp texture.
Question: Can you bake honey garlic butter chicken thighs instead of frying? Yes, you can bake these thighs by coating them in flour or cornstarch, placing them on a greased baking sheet, and baking at 375°F for about 30 minutes under foil. After baking, toss them in the honey garlic butter sauce and optionally bake again briefly to let the sauce set. Baking is a healthier alternative to pan-frying while still delivering tender, flavorful meat.
Question: Are honey garlic butter chicken thighs safe to eat if not crispy? Honey garlic butter chicken thighs are safe to eat as long as they reach an internal temperature of 165°F, regardless of whether they are crispy. Crispiness is a texture preference, not a safety requirement. The key is ensuring the chicken is fully cooked with juices running clear and no pink in the center.
Key Takeaways
- Dredge chicken thighs in flour and sear skin-side down for 4–5 minutes to achieve a golden, crispy exterior.
- Cook the honey-garlic glaze separately to prevent the sugar from burning and keep the skin from getting soggy.
- Maintain low-to-medium heat when cooking garlic so it stays aromatic and never turns bitter.
- Finish the chicken in a 400°F oven or in the pan with the glaze to lock in juiciness.
- Always check that the internal temperature reaches 165°F for food safety.
What You Need
| Item | Purpose | Notes |
|---|---|---|
| Skin-on or boneless chicken thighs | Main protein | 6–8 thighs (about 2–2.5 lbs) |
| Honey | Sweet base of glaze | Use raw or pasteurized; about 6 tablespoons |
| Soy sauce | Umami and saltiness | Low-sodium to control salt levels |
| Apple cider vinegar or rice vinegar | Acidity to balance sweetness | 1–2 tablespoons prevents cloying flavor |
| Fresh garlic | Aromatic foundation | 4–6 cloves, minced |
| Butter | Richness and sauce body | 2–3 tablespoons |
| All-purpose flour | Optional coating for extra crispness | Use cornstarch for a gluten-free version |
| Vegetable or olive oil | Medium-high heat searing | 1–2 tablespoons; use oil with high smoke point |
| Salt and black pepper | Basic seasoning | To taste |
| Red pepper flakes | Optional heat | 1/4 teaspoon for subtle kick |
| Oven-proof skillet | Essential cookware | Cast iron or stainless steel; must fit stovetop and oven |
| Meat thermometer | Safety and doneness check | Instant-read digital preferred |
| Whisk and small bowl | Sauce prep | For mixing glaze ingredients ahead of time |
| Large spatula | Pressing skin and flipping | Helps achieve even crispiness |
Step 1: Prep and Season Your Chicken
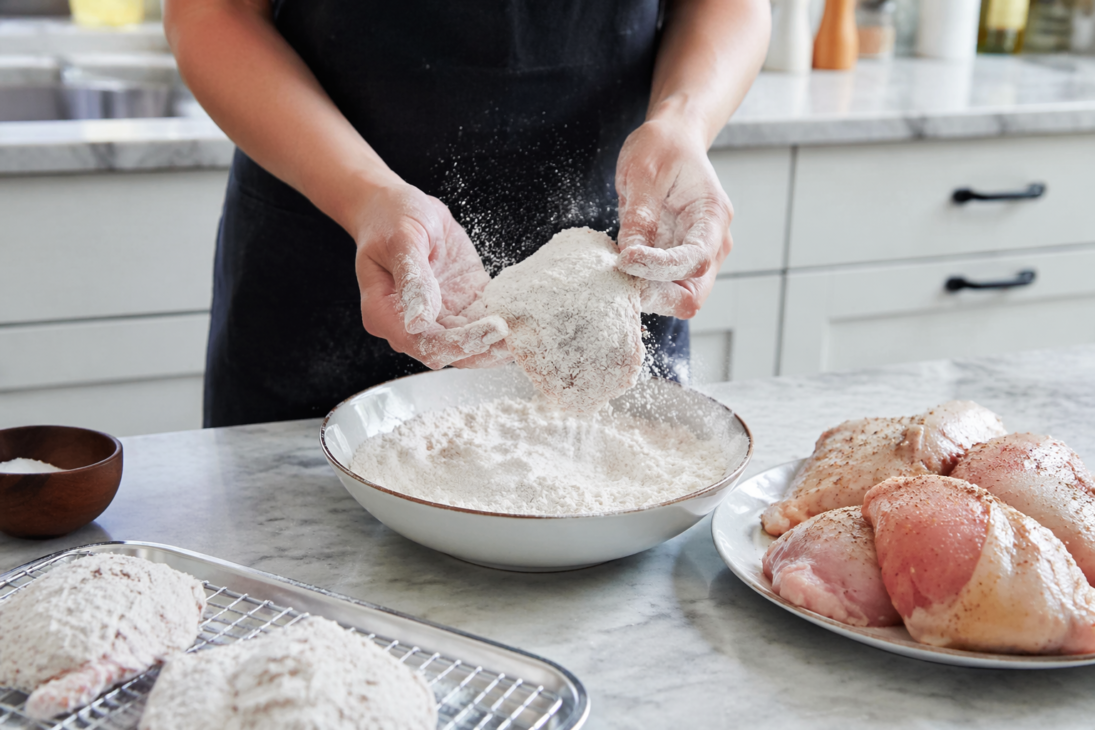
Pat the chicken thighs dry with paper towels. Moisture on the surface steams the skin instead of crisping it, so this step matters more than you’d think. Season both sides generously with salt and pepper—don’t be shy, since the seasoning has to penetrate the meat and account for the sweetness of the glaze.
If you want extra crispiness, dredge each thigh in a shallow dish of all-purpose flour, coating both sides lightly and shaking off the excess. The flour creates a golden crust that stays crunchy even when the glaze hits the pan. Skip this step if you prefer a cleaner, less-coated finish—both work, just with slightly different textures.
Step 2: Sear for Crispy Skin
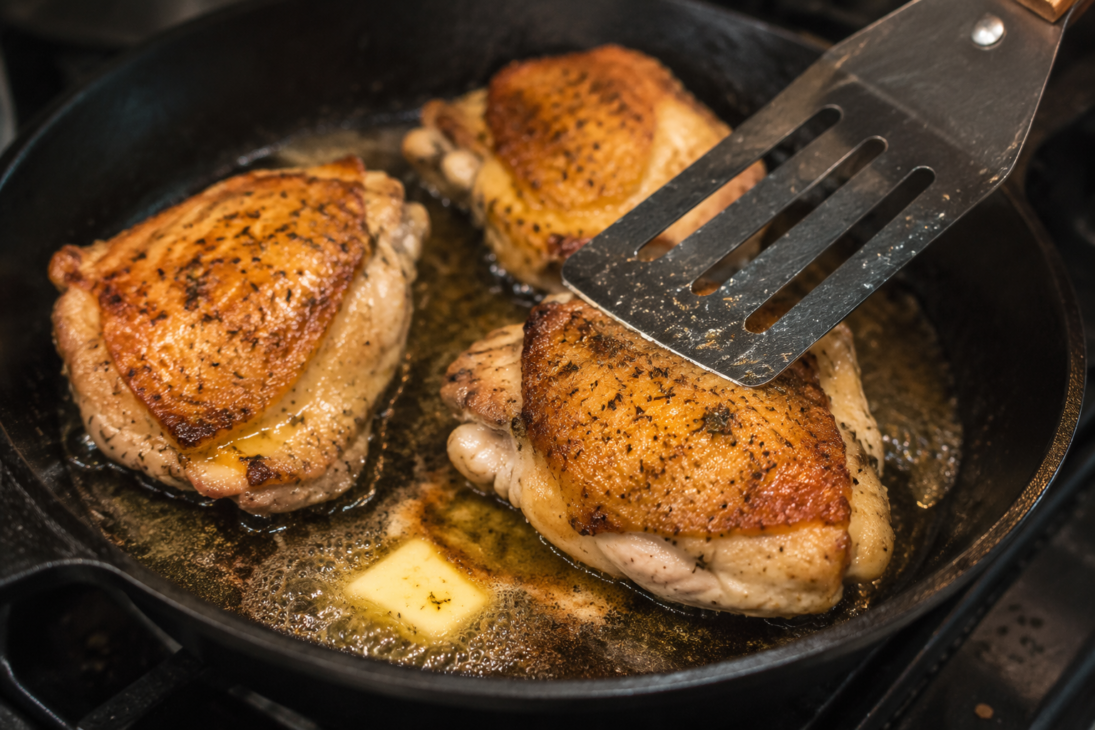
Heat your oven-proof skillet over medium-high heat. Add about 1 tablespoon of vegetable oil and let it warm until it shimmers—this takes roughly 1 minute. You’re aiming for hot enough to sear, not so hot that the oil smokes aggressively.
Place the chicken thighs skin-side down in the skillet. Press them gently with a large spatula and hold steady for the first 30 seconds to encourage even contact with the hot surface. This direct pressure is the secret to achieving that golden, crispy skin. Cook skin-side down for 4–5 minutes without moving them around. Resist the urge to peek or flip early—the skin needs uninterrupted time to render fat and brown. When the skin lifts easily from the pan without sticking, you’ll know it’s ready.
Flip the thighs and cook the other side for 3–4 minutes until golden. The meat side won’t brown as dramatically, and that’s fine. At this stage, you’re building color and flavor, not cooking the thighs all the way through.
Step 3: Prepare the Honey Garlic Glaze
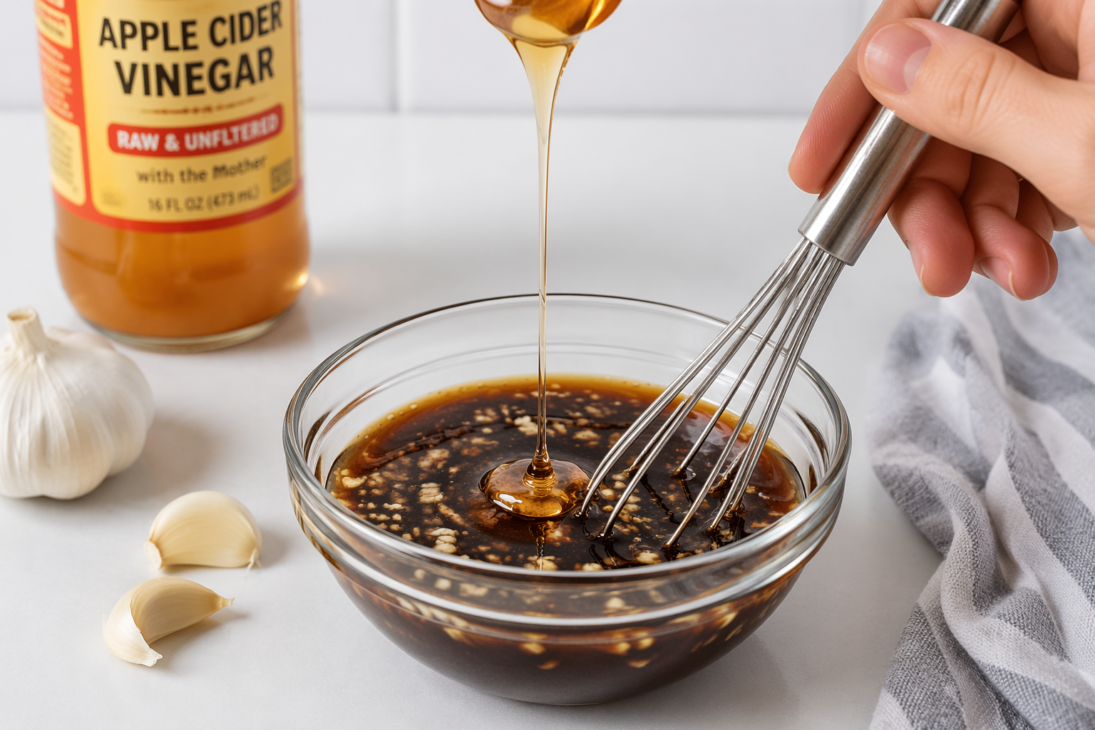
While the chicken sears, combine your sauce ingredients in a small bowl. Whisk together 6 tablespoons of honey, 3 tablespoons of soy sauce, 2 tablespoons of apple cider vinegar, and optional red pepper flakes if you want a touch of heat. Stir until the honey dissolves and everything is smooth. This mixture is your flavor foundation—the balance between sweet, salty, and acidic should feel just right when you taste a tiny spoonful.
The vinegar is crucial here. It cuts through the honey’s sweetness and prevents the glaze from tasting one-dimensional. If you skip it or reduce it too much, the sauce becomes cloying and flat. Apple cider vinegar brings earthiness; rice vinegar is lighter and more delicate. Pick whichever suits your taste.
Step 4: Make the Butter-Garlic Base
Once the chicken is seared, remove it temporarily from the skillet and set it on a clean plate. Reduce the heat to medium or medium-low, then add 2 tablespoons of butter to the pan. Let it melt completely.
Add your minced fresh garlic—about 4 to 6 cloves depending on your love of garlic—and cook for 30 seconds to 1 minute, stirring constantly. Low-to-medium heat is non-negotiable here. If the heat is too high, the garlic will turn dark brown or black and taste bitter instead of sweet and aromatic. You’re looking for it to become fragrant and just barely golden. The butter should be foaming gently, and you should smell that unmistakable garlic aroma.
Step 5: Combine the Sauce and Return the Chicken
Pour the honey-soy-vinegar mixture into the garlic-butter pan and stir for about 10–15 seconds. The sauce will bubble and smell amazing. Lower the heat to medium and return the chicken thighs to the skillet, positioning them skin-side up. Make sure each piece is partially submerged in or coated with the sauce.
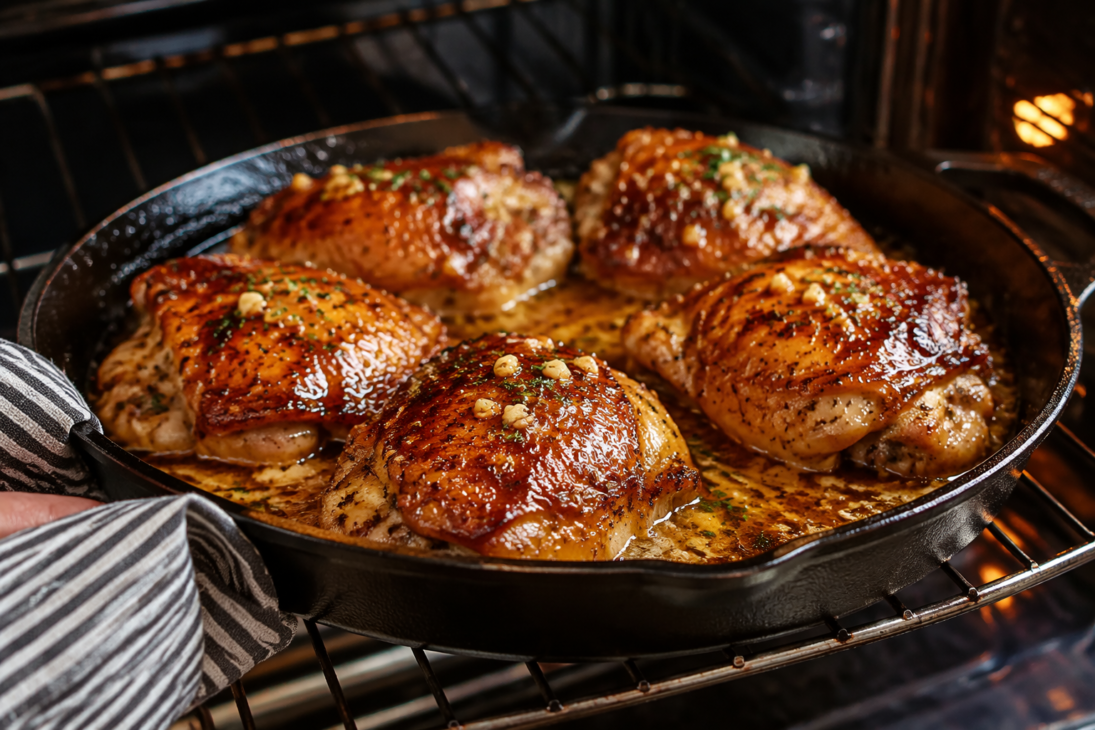
Cover the skillet with a lid or foil and either transfer it to a preheated 400°F oven or continue cooking on the stovetop over medium heat. If finishing in the oven, bake for 12–15 minutes until the internal temperature reaches 165°F when checked with a meat thermometer inserted into the thickest part of the thigh without touching bone. If keeping it on the stovetop, reduce heat to medium-low and simmer gently for 8–10 minutes, covered, checking the temperature after 8 minutes.
The sauce will begin to thicken and take on a glossy, caramelized appearance as the honey reduces slightly. The chicken will be fork-tender and juicy inside, with skin that’s still mostly crispy from the initial sear.
Step 6: Finish and Plate
Remove the skillet from heat and let it rest for 2–3 minutes. This resting period allows the juices to redistribute through the meat, ensuring each bite stays juicy rather than running dry onto the plate.
Transfer the chicken thighs to a serving platter and pour any sauce from the skillet over the top. The thighs should glisten with the honey-garlic glaze, and the sauce should coat a spoon lightly without being runny. If the sauce looks too thin after cooking, return the skillet to the stovetop over medium heat and let it simmer for another 1–2 minutes to reduce and thicken.
Garnish with fresh chopped parsley, a sprinkle of red pepper flakes, or even a squeeze of fresh lemon juice if you want to brighten the flavors. Serve immediately while the skin is still at its crispiest.
Tips for Perfect Honey Garlic Butter Chicken Thighs
Don’t overcrowd the pan. If your skillet is small and your chicken thighs large, work in batches rather than cramming them all in at once. Overlapping pieces will steam rather than sear, and you’ll end up with pale, soft skin instead of crispy golden skin.
Use a meat thermometer religiously. Chicken thighs are forgiving compared to breasts—they stay juicy even if slightly overcooked—but there’s no reason to guess. Stick-read thermometers give you the exact temperature in seconds.
Make the sauce ahead of time. You can whisk the honey, soy sauce, and vinegar together up to 1 day in advance and store it in a sealed container in the fridge. The morning of cooking, just add it to the pan with fresh garlic and butter right before finishing the chicken. This saves time and eliminates one step during the actual cooking.
If using boneless, skinless thighs, reduce the initial sear time by about 1 minute per side since there’s less mass to brown. The technique stays the same, just faster. Similarly, if your thighs are particularly thick, give them an extra 2–3 minutes in the oven to ensure the inside reaches 165°F.
Leftovers are excellent. Store cooled chicken and sauce together in an airtight container for up to 3 days. Reheat gently on the stovetop over low-to-medium heat with a splash of water or broth to restore the sauce’s body, or shred the chicken and toss it into fried rice for So Fun So Easy Chicken Wing Sauce variations.
Common Mistakes to Avoid
Burning the garlic is the most common stumble. Turn the heat too high or leave the garlic in the pan too long, and it browns into a bitter, acrid powder that ruins the whole sauce. Always cook garlic over medium or medium-low heat and stir constantly. If you see it darkening too quickly, pull the pan off heat immediately and add the liquid sauce to cool it down.
Adding the honey-soy mixture to a scorching-hot pan is another trap. If you dump cold sauce into a very hot skillet, the bottom of the pan may burn before the sauce thickens, creating a charred, unpleasant flavor. This is why cooking the sauce separately and adding it to a cooler garlic-butter base works so well. The temperature is more controlled, and nothing scorches.
Skipping the paper-towel dry step leaves moisture on the skin that prevents it from crisping properly. Wet skin steams, not sears. Two seconds with paper towels makes all the difference between crispy and rubbery.
Not seasoning the chicken enough means bland meat inside. Salt and pepper applied before searing give the inside time to absorb seasoning, whereas adding salt only at the end seasons just the surface. Be generous in step 1.
Troubleshooting Your Batch
If your sauce is too thin after cooking, the glaze didn’t reduce enough. Return the skillet (with the chicken removed) to medium heat and let it bubble gently for 1–2 minutes. The sauce will thicken as it cooks down. If you’re in a hurry, whisk a tiny amount of cornstarch with cold water and stir it into the sauce, then bring it to a gentle boil for 30 seconds—this creates an instant thickening effect.
If the chicken skin isn’t crispy after searing, your pan wasn’t hot enough or the thighs had too much surface moisture. For next time, ensure the oil is shimmering before the chicken hits the pan, and pat the thighs very dry. If it’s happening right now, the good news is the chicken is still perfectly safe and delicious to eat—crispiness is purely about texture, not food safety.
If the glaze looks burnt or tastes bitter, the garlic overcooled. There’s no fixing it at this stage, but know that next time, lower the heat before adding garlic and watch it closely. Garlic is fast—30 seconds to 1 minute is all it needs.
If your thighs aren’t cooked through after the suggested time, your oven temperature may be slightly off, or the thighs are larger than average. Check the internal temperature with a thermometer. If it’s below 165°F, cover the skillet and return it to the oven for another 3–5 minutes. Better to add a few minutes than risk underdone chicken.
Recipe Card
Honey Garlic Butter Chicken Thighs
Crispy-skinned chicken thighs glazed in a sticky-sweet honey, garlic, and butter sauce. Juicy inside, golden outside, and ready in under 40 minutes.
Prep: 10 minutesCook: 30 minutesTotal: 40 minutesYield: 4 servings (2 thighs per person)Category: Main CourseCuisine: Asian-inspired
Ingredients
- 8 skin-on bone-in chicken thighs (about 2.5 lbs)
- 6 tablespoons honey
- 3 tablespoons soy sauce
- 2 tablespoons apple cider vinegar or rice vinegar
- 4-6 cloves fresh garlic, minced
- 2-3 tablespoons butter
- 1-2 tablespoons vegetable or olive oil
- 1/4 cup all-purpose flour (optional, for dredging)
- Salt and black pepper to taste
- 1/4 teaspoon red pepper flakes (optional)
- Fresh parsley for garnish (optional)
Instructions
- Pat chicken thighs dry with paper towels and season both sides generously with salt and pepper.
- Lightly dredge thighs in flour if desired, shaking off excess.
- Heat oil in an oven-proof skillet over medium-high heat until shimmering. Place thighs skin-side down, press gently with a spatula, and cook 4-5 minutes without moving.
- Flip thighs and cook the other side 3-4 minutes until golden. Remove to a plate.
- Reduce heat to medium-low, add butter to the pan, then add minced garlic and cook 30 seconds, stirring constantly until fragrant (do not brown).
- In a small bowl, whisk together honey, soy sauce, apple cider vinegar, and red pepper flakes. Pour into the garlic-butter pan and stir.
- Return chicken thighs to the skillet skin-side up, cover, and transfer to a preheated 400°F oven. Bake 12-15 minutes until internal temperature reaches 165°F.
- Let rest 2-3 minutes, then plate and drizzle with sauce. Garnish with fresh parsley if desired.
Nutrition Info (per serving)
| Calories | 420 |
| Protein | 38g |
| Carbs | 22g |
| Fat | 18g |
| Fiber | 0g |
| Sugar | 18g |
| Sodium | 620mg |
Notes
- Do not let garlic brown or it will taste bitter. Keep heat at medium or lower.
- For extra sauce reduction, simmer uncovered in the oven for the last 3-5 minutes.
- Boneless, skinless thighs cook 1-2 minutes faster per side.
- Leftovers keep 3 days refrigerated and reheat well over low-to-medium heat.
My Experience With Honey Garlic Butter Chicken Thighs Recipe
I’ve made this dish dozens of times now, and honestly, it’s become my go-to when I need something that looks impressive but doesn’t require a lot of fussing. The first time I attempted it, I made the classic mistake of cooking the sauce in the same pan as the chicken—the honey burnt on the bottom, the skin turned soggy, and the whole thing tasted like disappointment. Once I switched to making the glaze separately and adding it partway through, everything changed. The skin stayed crispy, the sauce thickened into this glossy amber coating, and the garlic stayed sweet and aromatic instead of bitter.
What I appreciate most is how forgiving chicken thighs are compared to breasts. They’re nearly impossible to dry out, which means even if you leave them in the oven a few minutes longer than planned, you’re still getting juicy, tender meat. And the honey-garlic combination is genuinely foolproof—the acidity from the vinegar, the sweetness from the honey, and the umami from soy sauce create this perfect balance that makes everything taste richer than the ingredient list suggests.
One thing I’ve learned: don’t skip the initial sear. That golden crust is what separates this from just stewed chicken in sauce. The meat underneath stays juicy, but the surface gets texture and caramelized flavor that single-method cooking (like oven-only) can’t deliver. Have you tried a technique where you cook the sauce separately from the protein, or does that sound like extra work?
FAQ
Q: How long does it take to cook honey garlic butter chicken thighs?
Pan-searing and baking honey garlic butter chicken thighs typically takes 25–35 minutes total. You sauté the thighs for 3–4 minutes per side, then bake them at 350°F for 25 minutes. Alternatively, baking coated thighs at 375°F takes about 30 minutes, plus 5–10 minutes to simmer and thicken the sauce.
Q: Does honey garlic butter chicken thighs sauce need to simmer?
Yes, the sauce should simmer for 4–5 minutes to allow the flavors to meld and the sauce to thicken slightly. Simmering helps the honey, soy sauce, garlic, and butter combine into a rich, sticky glaze that coats the chicken evenly. This step is essential for achieving the signature glossy finish.
Q: When should you add garlic to honey garlic butter chicken thighs?
Add garlic after melting butter in the pan and reducing the heat to medium, cooking it for about 30 seconds until fragrant. Adding garlic too early or over high heat can cause it to burn and turn bitter. Cooking it gently in butter ensures a sweet, aromatic flavor that complements the honey and soy sauce.
Q: Is honey garlic butter chicken thighs recipe gluten-free?
The recipe is not inherently gluten-free because it typically includes soy sauce and flour or cornstarch, which may contain gluten. To make it gluten-free, substitute regular soy sauce with tamari or gluten-free soy sauce and use cornstarch instead of wheat flour. Always check labels to confirm all ingredients are certified gluten-free.
Q: What vegetables pair best with honey garlic butter chicken thighs?
Roasted broccoli, steamed rice, and fried rice are excellent pairings that complement the sweet and savory flavors of honey garlic butter chicken thighs. Other good options include sautéed carrots, green beans, or a simple cucumber salad. These sides balance the rich sauce and add texture and freshness to the meal.
Q: Will honey garlic butter chicken thighs work with chicken breasts?
Yes, honey garlic butter chicken breasts work well, but they require careful cooking to avoid drying out. Pound the breasts to ½-inch thickness, dredge in flour, and sear for 4–5 minutes per side before adding the sauce. Cook until the internal temperature reaches 165°F, then toss in the sauce and serve immediately.
Q: Which oil is best for cooking honey garlic butter chicken thighs?
Vegetable oil or olive oil is best for cooking honey garlic butter chicken thighs because they have a high smoke point and neutral flavor. Heat the oil in a skillet over medium-high heat until hot before adding the chicken. This ensures a golden, crispy exterior without burning the oil or meat.
Conclusion
Honey garlic butter chicken thighs are a weeknight staple that tastes far more complicated than it actually is. The real secret is understanding why each step matters: drying the chicken prevents steam, searing creates texture and flavor, cooking the sauce separately protects the crispiness, and using low heat for the garlic keeps it aromatic instead of bitter. Once you nail these fundamentals, the dish becomes second nature. You can double the batch, add vegetables to the same pan, or serve it over rice to soak up every drop of that sticky-sweet glaze.
The beauty of this recipe is how easily it adapts. Prefer boneless thighs? Shave a couple minutes off the sear time. Want more heat? Increase the red pepper flakes. Cooking for picky eaters? Reduce the honey slightly for less sweetness. The framework stays solid, and the results are consistently golden, juicy, and glossy every time.
References
- AllRecipes. (n.d.). Honey Garlic Chicken Thighs Recipe. https://www.allrecipes.com/recipe/282124/honey-garlic-chicken-thighs/
- The Pioneer Woman. (n.d.). Honey-Garlic Chicken Thighs Recipe. https://www.thepioneerwoman.com/food-cooking/recipes/a64444717/honey-garlic-chicken-thighs-recipe/
- Simple Home Edit. (n.d.). Honey Garlic Chicken Thighs Recipe. https://simplehomeedit.com/recipe/honey-garlic-chicken-thighs/
- Butter Your Biscuit. (n.d.). Honey Butter Garlic Chicken Recipe. https://butteryourbiscuit.com/honey-butter-garlic-chicken/
- Britney Breaks Bread. (n.d.). Honey Garlic Chicken Thighs (Easy, Juicy & Packed with Flavor!). https://britneybreaksbread.com/honey-garlic-chicken-thighs/
- I Heart Umami. (n.d.). Crispy Honey Garlic Chicken Thighs. https://iheartumami.com/honey-garlic-chicken-thighs/
- Eat the Bite. (n.d.). Crispy Chicken Thighs with Honey Butter Garlic Sauce. https://eatthebite.com/crispy-chicken-thighs-honey-garlic-sauce/
- Kitchen Sanctuary. (n.d.). Honey Garlic Chicken. https://www.kitchensanctuary.com/honey-garlic-chicken/
