
Want to know what makes a truly great homemade condensed milk stand out from every store-bought version you’ve tried? The answer lies in understanding how simple reduction transforms ordinary milk and sugar into that thick, golden syrup. Whether you’re planning a summer dessert or a holiday baking session, making condensed milk from scratch gives you control over sweetness, texture, and flavor. This guide walks you through the traditional two-ingredient method, dairy-free alternatives, and the milk powder shortcut—plus troubleshooting tips to ensure creamy results every single time.
Quick Questions and Answers
Question: Can I really make condensed milk with just two ingredients? Answer: Yes. Milk and sugar are all you need for traditional condensed milk. The key is simmering the mixture for 30–45 minutes until roughly 60% of the water evaporates, creating that thick, caramelized consistency. Some recipes add a pinch of baking soda to stabilize texture and prevent curdling.
Question: How long does homemade condensed milk last in the fridge? Answer: Store it in an airtight mason jar for up to 5–7 days refrigerated. The mixture continues to thicken slightly as it cools, so don’t panic if it seems thinner while still warm. Homemade batches lack the preservatives of commercial versions, so use it within a week to be safe.
Question: What’s the fastest way to make condensed milk if I don’t have time to simmer? Answer: Use the milk powder method. Combine 1 cup milk powder, ½ cup powdered sugar, and 4 tablespoons of hot water in a blender. Mix until smooth and creamy. This no-heat version takes 5 minutes and works as a substitute for most recipes.
What You Need
| Item | Purpose | Notes |
|---|---|---|
| Whole milk (2 cups) | Base ingredient that reduces and thickens | Full-fat milk yields creamier results; skim or 1% works but tastes less rich |
| Granulated sugar (⅔ cup) | Sweetens and aids in thickening through evaporation | White sugar works best; honey or maple syrup changes flavor profile |
| Medium heavy-bottom saucepan | Prevents scorching by distributing heat evenly | Non-stick coating helps but isn’t essential; cast iron works well |
| Whisk or wooden spoon | Keeps mixture smooth and prevents lumps | Silicone scrapers help reach pan corners where mixture crusts |
| Measuring cups and spoons | Ensures proper ratios for consistent results | Digital scale optional but useful for precision |
| Optional: Baking soda (pinch) | Stabilizes milk proteins and prevents curdling | Use only ⅛ teaspoon; too much creates a soapy taste |
Optional ingredients for flavoring: vanilla extract (½ teaspoon), cinnamon stick (1), unsweetened cocoa powder (1 tablespoon), or nutmeg (pinch).
Step 1: Combine Milk and Sugar

Pour 2 cups of whole milk into your medium heavy-bottom saucepan. Add ⅔ cup granulated sugar. If you’re using the optional baking soda, add just a pinch now—this stabilizes the milk proteins and creates a smoother, less grainy final texture.
Set the heat to medium-low. This is crucial. High heat will scorch the milk sugars and ruin your batch with a burnt, gritty flavor. Stir constantly with a whisk until the sugar fully dissolves, which takes about 2–3 minutes. You should see no crystals remaining at the bottom of the pan.
Step 2: Bring to a Gentle Simmer

Once the sugar dissolves, increase the heat slightly to medium. Watch for tiny bubbles forming around the edges of the pan. This is a gentle simmer—exactly what you want. Do not let the mixture reach a rolling boil. Boiling causes milk proteins to burn rapidly, creating a scorched, bitter taste that ruins the entire batch.
The mixture should look steamy but calm. If large bubbles are aggressively breaking the surface, lower the heat back down. Patience here prevents disaster later.
Step 3: Maintain Low Heat and Stir Occasionally

Once simmering, reduce heat back to medium-low. Set a timer for 30 minutes as your starting point, though some batches need up to 45 minutes depending on your stove’s heat distribution and the width of your pan.
Stir every 5–7 minutes, making sure to scrape the sides and bottom of the pan. This prevents a thick crust from forming and ensures even reduction. Don’t walk away—leaving the pan unattended risks a burnt layer at the bottom that will contaminate the entire batch.
Step 4: Monitor Consistency and Color

Around the 25-minute mark, the mixture should noticeably lighten in color and become slightly thinner than when you started. Keep watching. The liquid is reducing as water evaporates, and you’re aiming for roughly 60% reduction (meaning about ⅔ cup remains from 2 cups).
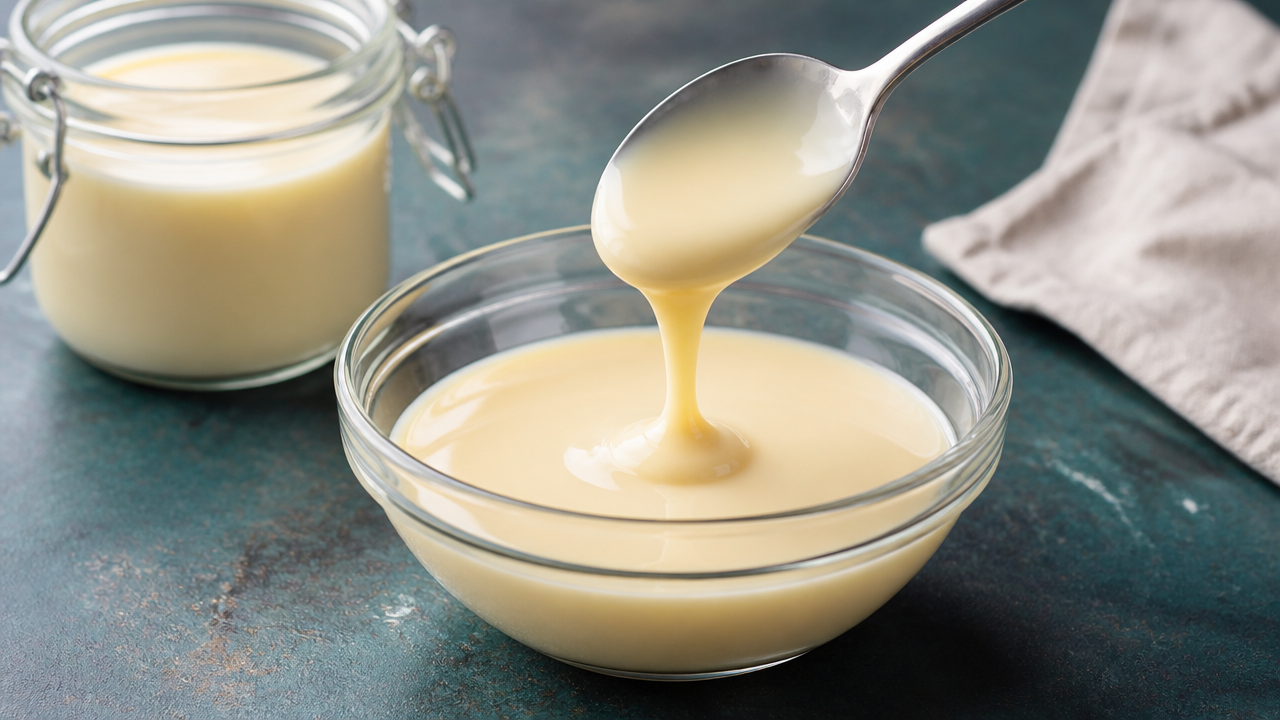
By minute 35–40, the mixture should turn a pale golden or light tan color. This color shift signals lactose caramelizing, which is normal and desirable. The consistency should thicken enough that it clings to your whisk for a brief moment before dripping back into the pan.
Step 5: Test the Consistency and Remove from Heat
To check if you’ve reached the right thickness, dip the back of a spoon into the mixture and run your finger across it. If the liquid beads and leaves a trail, you’re close. If it runs completely, you need another 5 minutes of simmering.
Keep in mind: the mixture will thicken significantly as it cools. What feels slightly thinner than you’d expect while hot will firm up beautifully in the fridge within 2 hours. Overcooked condensed milk becomes grainy and hard, so it’s better to err on the side of slightly too thin while warm.
Remove from heat and let it cool to room temperature before transferring to an airtight jar. If you’re adding flavorings like vanilla or cocoa powder, stir them in during the last minute of cooking.
Step 6: Cool and Store
Pour the warm condensed milk into a clean mason jar or airtight container. Let it sit at room temperature for about 1 hour, then refrigerate. The mixture will continue thickening as it cools—this is completely normal and desirable.
Once chilled, your homemade condensed milk should reach a consistency very close to the commercial version. Store it in the fridge for up to 5–7 days. Don’t freeze it; the texture separates when thawed.
Tips for Perfect Results Every Time
The single biggest mistake people make is using heat that’s too high. I cannot stress this enough. Medium-low is not a suggestion—it’s the difference between silky condensed milk and a pan of burnt sugar sludge. Your patience with heat control directly determines success.
Stirring matters more than most recipes emphasize. Every time you’re not stirring, a microscopic burnt layer is forming on the bottom. Stir every 5–7 minutes without fail. Use a heat-resistant spatula or wooden spoon to reach the edges, where buildup happens fastest.
If you’re making a large batch for a specific dessert project, try testing a small 1-cup batch first. This gives you a feel for your particular stove’s heat distribution and your pan’s responsiveness. Once you know how your equipment behaves, scaling up becomes predictable.
Flavor additions work best when stirred in during the final minute of cooking. This prevents volatile compounds from evaporating. A Classic Microwave Cake Recipe or dessert that calls for condensed milk is perfect for using your homemade batch with custom flavors built in.
Want a richer, less sweet version? Use half milk and half heavy cream instead of all milk. The result is decadent and works beautifully in coffee or whipped into desserts.
FAQ
Q: Can I make condensed milk using dairy-free milk?
Coconut milk is the best dairy-free substitute. Use one 14-ounce can (about 1⅔ cups) of coconut milk with ⅔ cup sugar. The reduction happens faster than dairy milk—expect about 12 minutes of simmering instead of 30–45. Almond and oat milk work but produce a thinner final result because they lack the natural proteins that help thicken.
Q: What if I overheat my batch and it tastes burnt?
Unfortunately, you cannot salvage burnt condensed milk. Burnt flavor permeates the entire batch and no amount of flavoring masks it. Start over. The good news: it takes only 30–45 minutes, so the loss is minimal. Burnt batches happen to everyone at least once—consider it tuition.
Q: Can I use milk powder instead of liquid milk?
Yes. Combine 1 cup milk powder, ½ cup powdered sugar, and 4 tablespoons hot water in a blender. Mix until smooth. This produces a result remarkably similar to the traditional method but takes only 5 minutes. Use this method when time is short or you need condensed milk in an emergency.
Q: Does the fat percentage of milk affect the final product?
Absolutely. Whole milk (3.5% fat) produces the creamiest, richest condensed milk. Skim milk makes a thinner, less flavorful version. If using skim milk, you might add 2 tablespoons of heavy cream or an egg yolk (pasteurized, for safety) to improve body and mouthfeel. Two-percent milk is a solid middle ground.
Q: How do I know if my condensed milk has gone bad?
Smell it. Fresh homemade condensed milk smells sweet and milky. Any sour, rancid, or off odor means it’s spoiled. Look for mold on the surface or visible separation. Taste a tiny amount—spoiled milk tastes distinctly sour. When in doubt, throw it out.
Q: Can I use honey or maple syrup instead of sugar?
Yes, though the flavor changes noticeably. Honey adds subtle floral notes; maple syrup brings earthiness. Use the same volume (⅔ cup) as you would sugar. Be aware that honey and maple syrup reduce slightly faster than white sugar, so watch the pan closely and stop simmering a few minutes earlier.
Q: What’s the yield of a batch, and is it enough?
A standard batch (2 cups milk + ⅔ cup sugar) yields about 180–190 grams, which is roughly ⅔ cup. This is almost exactly half a commercial can. If you need a full can’s worth, double the recipe. Doubling doesn’t increase cooking time significantly—maybe 5 extra minutes.
Q: Can I make condensed milk in a slow cooker?
You can, though it’s slower and requires more monitoring. Fill a slow cooker halfway with water, place your milk-sugar mixture in an oven-safe jar inside the water bath (water should come halfway up the jar), and cook on low for 3–4 hours. Stir every 30 minutes. Results are excellent but time commitment is higher.
Q: Will homemade condensed milk work in any recipe calling for the canned version?
Almost always, yes. Homemade and commercial condensed milk are functionally identical. One small difference: homemade lacks the emulsifiers and stabilizers in canned versions, so it separates more easily. For recipes that call for mixing condensed milk with other liquids, let it sit undisturbed for a few hours before using to ensure even consistency.
Q: Why does my condensed milk taste grainy?
Graininess usually means the heat was too high at some point, causing milk solids to scorch and separate. It can also result from too much stirring after the mixture thickens—aggressive stirring breaks down the emulsion. Prevent this by using medium-low heat and stirring gently. If graininess happens, strain the batch through cheesecloth, though this removes some volume.
My Experience With Condensed Milk Recipe
I’ve made condensed milk dozens of times now, and honestly, the learning curve is gentler than most people expect. My first batch was a disaster—I cranked the heat to medium thinking I’d speed things up, and ten minutes later I had a pan that smelled like burnt caramel and tasted worse. That failure taught me everything. Now I treat condensed milk like a meditation: low heat, patient stirring, and absolutely no rushing.
The milk powder shortcut changed my life during the pandemic when I couldn’t source commercial condensed milk anywhere. It sounds like cheating, but it works beautifully for most baking applications. That said, the traditional simmered version tastes objectively better—there’s a subtle caramelization you don’t get from powder. It’s worth the 45 minutes if you have time.
What surprised me most was how forgiving the timing actually is. I expected precision, but homemade condensed milk is legitimately hard to mess up once you nail the heat level. Slightly under-reduced? It’ll keep thickening in the fridge. Slightly over? It’s still usable—just thicker, which works fine in coffee or desserts. The burnt disaster is the real danger, and that’s entirely avoidable with medium-low heat.
For a Festive Apple Cake Recipe or any dessert requiring condensed milk, making it fresh at home feels indulgent in the best way. There’s something satisfying about a shelf-stable ingredient you made yourself. Have you tried making condensed milk, or is this your first time considering it?
Conclusion
Making condensed milk at home is simpler than most people assume and far more rewarding than buying canned versions. You need only milk, sugar, and patience—plus 30 to 45 minutes of gentle simmering. The traditional method produces a silky, caramelized syrup perfect for any recipe calling for condensed milk, from coffee drinks to baked goods like a Dot Cake Recipe.
If you don’t have time for simmering, the milk powder method delivers excellent results in just 5 minutes. Dairy-free bakers can substitute coconut milk without sacrificing quality. The key to success is respecting low, steady heat and stirring consistently—these two habits prevent nearly all failures.
Store your homemade batch in an airtight jar for up to a week, and enjoy the confidence that comes from knowing exactly what’s in your ingredients. Whether you’re making this for a specific dessert project or simply stocking your pantry, homemade condensed milk is easier than you think and tastes noticeably better than you’d expect.
Recipe Card
Homemade Sweetened Condensed Milk
A simple two-ingredient recipe that transforms milk and sugar into thick, creamy condensed milk in under an hour. Perfect for desserts, coffee, and baking.
Prep: 5 minutesCook: 40 minutesTotal: 45 minutesYield: ⅔ cup (approximately 190g)Category: CondimentCuisine: American
Ingredients
- 2 cups whole milk
- ⅔ cup granulated sugar
- Pinch of baking soda (optional, for smoothness)
Instructions
- Pour 2 cups of whole milk into a medium heavy-bottom saucepan and add ⅔ cup granulated sugar.
- Set heat to medium-low and stir constantly with a whisk until all sugar crystals fully dissolve, about 2–3 minutes.
- Increase heat slightly to medium and bring the mixture to a gentle simmer with small bubbles around the edges—do not allow a rolling boil.
- Reduce heat back to medium-low and maintain a low simmer for 30–45 minutes, stirring every 5–7 minutes and scraping the sides and bottom of the pan.
- Watch for the mixture to turn a pale golden color and thicken noticeably; the volume should reduce by roughly 60%.
- Test consistency by coating the back of a spoon; the mixture should cling briefly before dripping back into the pan.
- Remove from heat, cool to room temperature, then transfer to an airtight jar and refrigerate for at least 2 hours before using.
Nutrition Info (per serving)
| Calories | 320 |
| Protein | 8g |
| Carbs | 52g |
| Fat | 8g |
| Fiber | 0g |
| Sugar | 50g |
| Sodium | 120mg |
Notes
- Do not skip the low heat setting; high heat burns the milk and ruins the batch.
- The mixture continues to thicken as it cools, so it may seem slightly thinner than expected while warm.
- Store in the refrigerator for up to 5–7 days in an airtight container.
- For dairy-free, substitute one 14-ounce can of coconut milk and reduce simmering time to approximately 12 minutes.
References
- Gemma Stafford. (n.d.). How to make condensed milk. Bigger Bolder Baking. https://www.biggerbolderbaking.com/how-to-make-condensed-milk/
- Greedy Eats. (n.d.). Condensed milk recipe. Greedy Eats. https://greedyeats.com/homemade-condensed-milk/
- Simply Recipes. (n.d.). Homemade sweetened condensed milk recipe. Simply Recipes. https://www.simplyrecipes.com/homemade-sweetened-condensed-milk-recipe-7197640
- Sharmi Bhattacharya. (n.d.). How to make condensed milk. Sharmis Passions. https://www.sharmispassions.com/homemade-condensed-milk-recipe/
- African Bites. (n.d.). How to make condensed milk. African Bites. https://www.africanbites.com/how-to-make-condensed-milk/
- Cheese Making. (n.d.). How to make condensed milk at home. Cheese Making. https://cheesemaking.com/blogs/fun-along-the-whey/how-to-make-condensed-milk
- Pastry & Beyond. (n.d.). Homemade condensed milk. Pastry & Beyond. https://pastryandbeyond.com/homemade-condensed-milk/
- Don’t Waste the Crumbs. (n.d.). Easy 4 ingredient sweetened condensed milk (+ video). Don’t Waste the Crumbs. https://dontwastethecrumbs.com/homemade-sweetened-condensed-milk/
